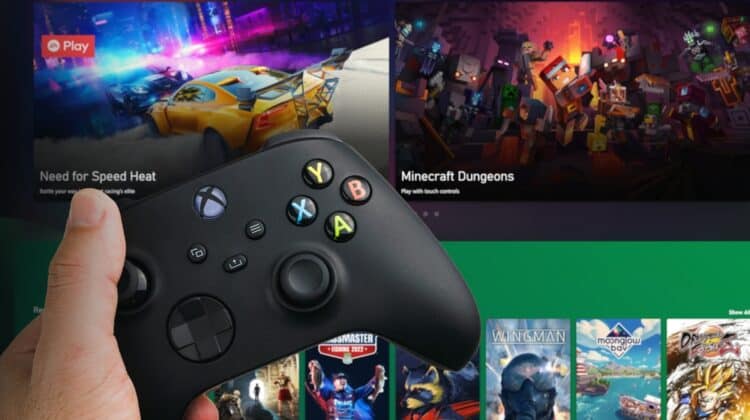
Xbox 360 isn’t only a gaming console; it also serves as a media streaming center where you can watch TV or recorded videos and play music files on demand.
Besides, you can store almost any file type on its built-in hard drive.
Therefore, just like any other hard drive, one might assume that it should allow you to move its information, including music files, to other devices.
However, as soon as you insert a USB to copy your music tracks, you receive a warning telling you the operation isn’t possible!
Therefore, how can you transfer music from Xbox 360 to other devices?
Read on to find the answer. You’ll also learn how to extract music from your PC and add songs to the console.
How to Transfer Music from Xbox 360 to Flash Drive

You can easily add MP3 files to your Xbox 360 and listen to music while playing games.
However, it is not possible to do it the other way around as Microsoft doesn’t let you move those files from a console to a flash drive simply because it’s against copyright laws.
The copyright owner(s) can file a lawsuit against you or Xbox if you attempt to share them with other devices, so
Microsoft has disabled the option, and they state this in their terms of use and policies.
Of course, there’s always a workaround.
Just remember that you’ll void your Xbox warranty by breaching their terms of use.
One way to extract music from Xbox is using a data transfer cable.
How to Transfer Music from Xbox 360 to PC
Before anything, you need to buy an Xbox file transfer cable, which you can find online or at local game stores.
It’s a good idea, however, to make sure to invest in an original Microsoft cable since the company doesn’t authorize or approve the performance of third-party cables.
Using them may harm your console.
Then, continue with the following steps:
- Switch off and unplug the console.
- Find a way to take out the Xbox hard drive. (Go to the section below if you don’t know
how.) - Connect one end of the cable to the removed HDD and the other end to your PC’s USB
port. - Open drive management where you can see an unknown drive.
- Right-click on the drive and hit “recognize drive.”
- It’ll identify the Xbox 360 hard drive so you can access its content.
- Open the new device on your system, select your music files, and copy/move.
Note: If the files still don’t appear on your computer, chances are it can’t recognize the file formats.
One solution to that problem is to install the Xplorer360 PC software.
It recognizes the file formats and lets you view, add, delete, copy, or move whatever on your console via your computer.
How to Remove Xbox 360 Hard Drive

- Stand your console in a vertical position.
- Spot the slider button at the top of your console and push it back to eject the protective cap.
- You’ll see four screws once you remove the seal.
- Unscrew them with a star screwdriver.
- Use your nails, a plastic card, or a plectrum to take off the cover.
- Start with the rounded part and push it gently, so the whole cap flips up.
- Undo some more screws to reach the hard drive caddy.
- Pull off the cover and remove the HDD.
Warning: Make sure to buy and wear an anti-static bracelet before starting the process to protect your device from electrostatic spikes.
Watch this video to learn how to use the strap:
Note: The above steps show instructions for removing Xbox 360 Original.
Other models may be different as to where and how they house the HDD.
For example, with the Xbox 360 S, you can access the hard drive only by pressing a release button at the top.
Then, pull the tab to lift off the HDD.
As you can see, no screws or ESD wrist straps are needed.
Note 2: In some Xbox versions, you don’t need to remove the HDD altogether to connect it to another device.
Once you open up the grill cover, you’ll see a protruding black socket where you can insert the transfer cable.
Xbox File Transfer Cable Alternatives

If you don’t want to pay for a file transfer cable, try one of these alternatives to connect your Xbox bare hard drive to your PC.
Port replicator: You can also replace the cable with a port replicator if you have one.
This is a hardware frame that lets you add standard peripherals such as an HDD to your PC.
You will need to ensure the docking station is compatible with 2.5-inch SATA drives.
PC HDD Inlet: The third and the most affordable way to access Xbox hard drive content is by installing it into your computer case.
The process is similar to putting in a regular HDD while building a PC:
- Turn off your system and unscrew the computer case.
- Use a SATA data cable to attach the hard drive to the motherboard.
- Then plug it in a SATA power connector.
If you want to have it connected for days, put the hard drive into the secondary HDD bay and close the chassis.
If it’s a temporary solution, you can just place it on a safe flat surface and wait until you successfully transfer the files and remove the piece.
How to Transfer Music from Xbox 360 to Another Console

You can transfer music or any other files to another console using the same transfer cable method:
- Make sure you’re running the latest software on your new console.
- Turn off your old gaming console and remove its HDD to connect the transfer cable.
- Now, turn off the other console and plug the cable’s other end into its USB port.
- Turn it on, and you’ll see a pop-up message saying a cable is connected.
- Click Yes to proceed.
- Select the source HDD that contains what you want to transfer.
- Choose the items you want to copy or move.
How to Move Files from Xbox 360 to USB

Unless you want to transfer music, you can move different files from Xbox 360 to a flash drive.
Here’s how:
- Plug a USB stick (preferably the Original Xbox 360 Memory Unit) into your console.
- Open My Xbox, go to Settings and click “System.”
- Click on what reads “Storage” or “Memory,” depending on your software version.
- Choose the storage device from which you want to transfer files (Xbox 360 HDD).
- Tap on the “Y” button of your controller, and select “Transfer Content” to view the file transfer menu.
- From there, choose your desired content type. (Games, Apps, Demos, Pictures, Videos, Themes, Music, System, or Avatar Items are your available options.)
- Highlight the items you wish to transfer.
- On the bottom, you’ll see a few options to delete, copy, or move the items.
- Select either Move or Copy.
- Now, select the name of the storage device you’ve inserted into the console.
- Tap on the Start button on the right and wait until the process completes.
Moving the items can take some time, depending on the file sizes.
Once finished, your system may ask you to confirm by pressing the “A” button.
After that, you can safely pull out the flash drive.
Why Can I Not Move Files from Xbox 360 to USB?

Files not viewing on your USB memory is sometimes a result of format contradiction.
The content on your Xbox 360 drives isn’t usually the same format as the files you use on your computer, so
your USB may not be able to read them.
To correct the situation, you can format the flash memory.
How to Format Your Flash Memory to Be Readable by Xbox 360

- Insert your flash memory into your PC.
- Go to “This PC,” and right-click on your USB drive’s name.
- Choose “Format” from the drop-down menu and change the format to FAT32.
- Confirm to start formatting.
Note: Formatting will erase all your data in the flash memory.
Make sure you back up the existing files before starting the process.
Here are other possibilities why you can’t move files from Xbox 360 to flash drive:
Other Problems with USB File Transfer

1. Your USB Drive Doesn’t Meet the Microsoft Requirements
Besides operating with the proper FAT32 file format, your USB should have a minimum of one-gigabyte storage.
2. You Haven’t Configured Your Xbox 360 USB
Unlike a computer OS, Xbox system software cannot automatically set up interfaces or peripherals.
You will have to configure a device before plugging it into your Xbox 360.
Method 1—Configure the memory via your console:
- Insert your USB into the gaming console.
- Go to your Xbox Home Page, and open Settings.
- Click on the “Memory” option that takes you to the “Storage Devices” menu.
- Click on the drive name and select “Configure.”
- The system will warn you that all your existing info will be erased.
- Press “Yes” to accept.
Method 2—Configure the memory in Windows:
You can also configure the drive using your windows device manager:
- Plug the memory stick into your computer USB port.
- Then, right-click on “This PC” and select “Manage” from the pop-up menu.
- Choose “Disc Management” to spot your flash memory among the list of other drivers.
- Right-click on the storage device and hit “Change Drive Letter Paths.”
- Choose a letter for your device and press OK.
- Go back to the file explorer and format the device to FAT 32.
- Eject the memory before you insert it back into the console. (Choose “Safely Remove Hardware” from the toolbar at the screen’s bottom.)
Note: If you’ve successfully configured/formatted your USB, but it still doesn’t show up on your console, try inserting it right after you boot the Xbox.
In some cases, a Microsoft bug doesn’t let the console recognize your memory after hours of gaming.
How to Import Music to an Xbox 360 Console

So far, we’ve talked about how you can extract music and files from Xbox 360.
How can we take the opposite path and add music files to your console?
A. Rip Music from a Disc to Your Xbox 360
The only way to save music in your Xbox storage is to copy audio files from a CD.
Other methods simply allow you to play the music rather than transferring it to the Xbox HDD.
Here’s how to do this:
- Pick an audio CD with your favorite songs.
Note: DVDs and Data CDs are not accepted because they violate copyright laws.
If you don’t want to pay for audio CDs, you can use a CD burner to record your own music to a CD-R disc.
This way, you will be able to bypass the restriction, but it’s not lawful.
- Load your custom CD or any other audio disc into the console.
- Your Music Player app will pop up automatically.
If it didn’t, you can open it manually from your Xbox Dashboard > Music tab > My Music Apps > “Music Player.”
- Highlight the “Current Disc” option and select “Rip CD” using your D-Pad.
- A list of selected songs will appear on a new window.
- Here, you can unselect some items if you don’t want them on your Xbox hard drive.
- Confirm your choices, and the device will start ripping the songs into your HDD.
- Now, you can easily play the tracks through your Music Player without inserting the CD.
B. Play Music From a USB
Microsoft lets you stream music tracks from your flash drive to Xbox, but it doesn’t allow copying them.
You can only access the music while you’re connected to the flash drive.
Here’s how to do so:
- Create a folder on your USB thumb drive and load it with as many audio tracks as you want.
- Make sure the music files are in the proper format.
You usually won’t need to take any steps here unless you’ve downloaded the files from iTunes.
If this is the case, browse “Optional Media Update“ from Microsoft Bing and install it on your Xbox.
This software allows your Xbox OS to identify and play Divx, XviD, MP4, AAC files, and other unprotected audio files.
- Plug your USB into one of the frontal or backside ports.
- If the Music Player didn’t open up automatically, press the Guide button to go to the Home screen.
- Select the Music tab from there and open your USB storage.
- You can now play the soundtracks as in any other music player.
Note: You can also stream music from your smartphone or digital audio player using this method, b
ut you’ll need a charging cable to be able to attach them to the Xbox USB port.
C. Play the Music Right from Your PC
- Connect your Xbox to the same network as your computer, so it’s recognizable by your system.
- Turn your Xbox on and activate it on your computer. (You can do this by going to Settings Devices > ConnectedDevices > Add a Device.)
- Go to your media player and select “Stream” from the upper toolbar.
- Select “More streaming options” and scroll down to the Xbox 360 option.
- Change it from “Blocked” to “Allowed” to share your music library with your console.
- Press “OK.”
- Go to your Music Player from the Xbox, choose “songs,” and play whatever you have on your PC’s player list.
D. Download Music with Xbox
The Xbox Music service allows you to download music straight from your console, so you won’t need to bother copying music or pairing the Xbox with your PC.
Note that this service is only available for Xbox Live Gold members.
Although legal, this method may not be economical since you can only download music files as long as you purchase them.
The following steps show you how to use it:
- Press the X button to go to your Xbox Home.
- Make sure you’re signed in to your Microsoft account.
- Then, go over to Groove Music app.
- Search the song name you want to download and then press Add by hitting the A key.
- The track will appear on your HDD music list.


