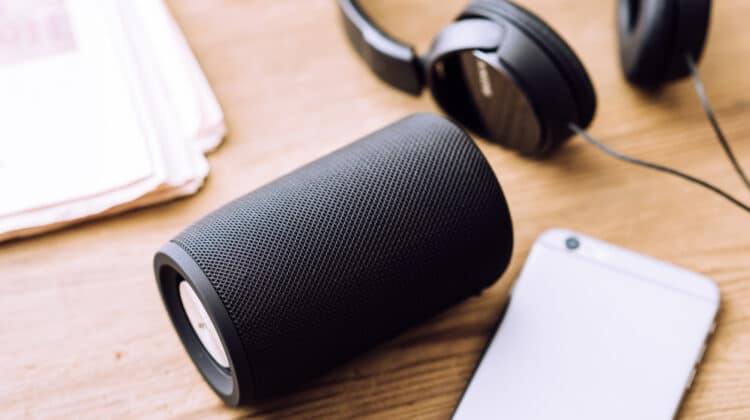
Apple’s wireless earphones called AirPods are easy to connect to your favorite Bluetooth-compatible devices like iPhones, iPads, and even Android devices.
That is until they’re not.
What should be an easy task can quickly disintegrate into a harrowing and frustrating ordeal.
Whether you’ve got AirPods Max, AirPods Pro, or AirPods of any generation, the troubleshooting steps are nearly identical.
Follow along, and you’ll be rocking out to your favorite tunes in no time.
Why Are My AirPods Not Connecting? (9 Reasons, Fixes)
1. They’re Not Charged

Let’s begin with the obvious.
Do your AirPods have a charge?
AirPods actually have three batteries in total: one for each earbud and one for the case.
To charge the AirPods, place them in the case and close the lid.
If the battery in your case is dead, plug in the case with the provided a lightning cable.
Doing so will charge both the case and the AirPods at the same time.
Third-generation AirPods and AirPods Pro come with a MagSafe-enabled charging case, which means you can magnetically (and wirelessly) charge your case with Apple’s MagSafe adapter.
If you don’t have either of these models, you can purchase a wireless charging-capable case that’s compatible with your Gen-1 or Gen-2 AirPods.
You’ll also need a Qi-certified charging pad on which to place the case when you need a charge.
From zero, AirPods require at least 20 minutes to reach a full charge but may take up to 60 minutes depending on the model you have.
The charging case can recharge fully in about an hour.
To check the battery status of your AirPods, open the case lid with the AirPods inside.
A green light indicates a full charge.
Red means low charge and amber indicates the charge is in the middle.
Once you get a green light, try connecting the AirPods to your device again.
If you have the AirPods Max, plug the provided Lightning cable into the bottom of the right headphone.
Pressing the noise control button will reveal the battery status with an LED indicator next to the charging port.
Just like with other AirPods, green indicates a full charge.
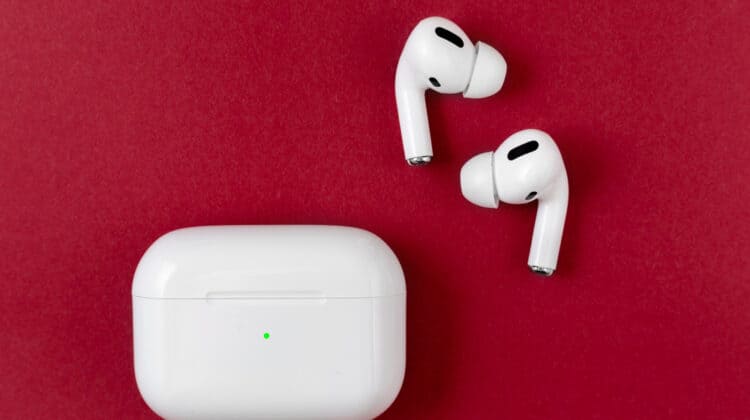
2. Bluetooth Is Turned Off
![]()
This is another obvious problem, but it’s an easy one to forget.
AirPods utilize Bluetooth wireless technology, so your device must have a Bluetooth radio and that radio must be enabled.
On an iPhone or iPad, open the Settings app and tap on “Bluetooth.”
Make sure that the slider is oriented to the right (you should see green) to indicate that Bluetooth is enabled.
On a Mac, open up the System Preferences app and click on “Bluetooth” and then click the “Turn Bluetooth On” button.
For other devices, the steps will vary, but generally, you will find the option to enable and disable Bluetooth in the settings of your device.
Once you’re sure Bluetooth is enabled, look for your AirPods in the list of devices.
Make sure your AirPods are nearby and the lid on the case is open.
Your AirPods should reconnect automatically, but if they don’t, locate the device from your list of previously connected Bluetooth devices, and then click or tap on the AirPods to connect.
If you’ve never connected your AirPods to the device, press and hold the button on the back of the charging case (or the noise control button for AirPods Max) for a few seconds until the status light flashes white.
The flashing white light indicates the AirPods are ready to be paired.
An iPhone or iPad will detect AirPods in pairing mode and prompt you to pair them with the tap of a button, thanks to the magic of the H1 chip (or the W1 chip on first-generation AirPods).
For other devices, watch for the AirPods to show up in the list of available Bluetooth devices and then select them in order to connect.
3. Your Devices Needs A Reset

If you’re still having trouble connecting your AirPods, your device might need to be rebooted.
For the majority of iOS and iPadOS devices, follow these steps:
- Put your device to sleep by pressing and releasing the sleep/wake button.
- In rapid succession, press and release the up volume button, down volume button, and then press and hold the sleep/wake button.
- Continue holding the button until you see the Apple logo appear on the screen.
If you release the button too early, the device will simply shut down rather than perform a reset.
This reset is like rebooting a computer.
You won’t lose any data or settings, but it’s a good thing to try whenever something with your Apple mobile device isn’t working properly.
On older iPhones and iPads, press and hold the sleep/wake and home buttons simultaneously until you see the Apple logo appear on the screen.
On a Mac, click on the Apple logo in the top left corner of the screen and then click “Restart…”
On a Windows computer, click on the Start button at the bottom of the screen, click on the power icon, and then click “Restart.”
For other devices, methods will vary.
Once your device has restarted, attempt to connect the AirPods again.
4. Your Software Is Out-of-Date

Are your device’s operating system and firmware up to date?
AirPods have minimum OS requirements for Apple devices as follows:
AirPods 3
iOS and iPadOS: 15.1
macOS: 12
watchOS: 8.1
tvOS: 15.1
AirPods Max
iOS and iPadOS: 14.3
macOS: 11.1
watchOS: 7.2
tvOS: 14
AirPods Pro
iOS and iPadOS: 13.2
macOS: 10.15.1
watchOS: 6.1
tvOS: 13.2
AirPods 2
iOS and iPadOS: 12.2
macOS: 10.14.4
watchOS: 5.2
tvOS: 12.2
AirPods
iOS and iPadOS: 10
macOS: 10.12
watchOS: 3
tvOS: 11
If your iPhone is on iOS 14, for example, you won’t be able to pair your phone with third-generation AirPods until you update to 15.1.
If your Apple device can’t update to the required OS version, you won’t be able to use those AirPods with your device.
Either upgrade your device or downgrade your AirPods to an older version.
Non-Apple devices do not necessarily have OS limitations, but if you’re having issues, it’s always a good idea to verify that your system software is up to date.
If you’re running Windows, also check that your Bluetooth driver is updated to the latest version.
One thing to note: your device must support Bluetooth 4.0 or higher.
Considering version 4 was released in 2010, you’re probably in the clear, but it’s worth noting that all the updates in the world won’t make a difference if your hardware is not compatible.
Once you’ve verified that your device is updated, attempt to connect your AirPods again.
If you’re still unable to connect them, it might be a good idea to “forget” the AirPods, which removes them from your list of Bluetooth devices (if they had been paired once before).
Then put the earphones back into pairing mode, and try to connect them again.
5. Your Device Is Out Of Range

Bluetooth is an amazing technology, but its range is relatively short.
If your device is too far away from your AirPods, you might have trouble connecting or staying connected.
All AirPods models except for the first generation AirPods run off of Apple’s proprietary H1 chip which uses the Bluetooth 5.0 standard.
Bluetooth 5 was released in July of 2016 and supports a theoretical 240 meters of distance with a direct line of sight and a range of 40 meters indoors.
The AirPods (1st generation) use Apple’s W1 chip with the 4.2 Bluetooth standard. Version 4.2 allows for a theoretical 60 meters with a line of sight and only 10 meters indoors.
If you’re still rocking the first-generation AirPods, make sure you stay within about 30 feet of your source device.
Another thing to consider with Bluetooth is interference.
Even if your AirPods are within range of your device, you might still experience audio clipping, disconnections, or the inability to connect at all if interference is present.
Bluetooth operates on the 2.4GHz spectrum, so anything running on the same frequency (like many Wi-Fi networks) could potentially disrupt the connection.
Try moving to a different environment to see if your AirPods connect and stay connected.
If so, interference might be your problem.
6. Your AirPods Need A Reset

If nothing else seems to be working, your AirPods just might need to be reset.
There are two different types of resets you can perform.
Before performing a reset, though, it’s worthwhile to attempt a simple restart of the AirPods.
No doubt you’ve tried this already, but if not, here’s what to do.
For AirPods and AirPods Pro, place both AirPods into the case and close the lid.
Leave the lid closed for ten seconds and then open the case again.
Quick and painless, right?
On the AirPods Max, press and hold the digital crown and noise control buttons simultaneously for about ten seconds until the status light flashes amber.
As soon as you see the amber light, let go of the buttons because if you hold these buttons down for too long, the AirPods Max will reset to factory default settings.
Once restarted, attempt to connect your AirPods to your device once again.
If the earphones still cannot connect, the next step is to reset the device.
Before trying either reset, though, you must remove, i.e., unpair, the earphones from your device.
On the iPhone or iPad, open up the Settings app and then tap on “Bluetooth.”
Under “MY DEVICES” tap on the blue “i” icon and then tap on “Forget This Device.”
Note: this also will remove the AirPods from any Apple device on which you are signed in with the same Apple ID.
On a Mac, click on the Apple logo in the top left corner of the screen and choose “System Preferences.”
Click on “Bluetooth.”
Locate your AirPods in the list of devices and hover your mouse over it to reveal a white X in a gray circle.
Click on the X and then click on “Remove.”
Instructions for other devices vary, so consult your documentation.
Usually, the method is similar to that of the Apple devices above.
Open up Bluetooth settings, locate your AirPods and click remove or forget to remove the device.
Once you’ve removed the device, the next step is to place the AirPods into pairing mode.
(This is more of a soft reset than a true factory restore.)
Use the instructions from step two above to initiate pairing mode, and then attempt to connect your AirPods to your device.
If pairing is not successful, it’s time to bring out the hammer.
No, not a literal hammer—please don’t do that—but rather a metaphorical hammer.
Perform a factory reset on your AirPods.
As alluded to above, pressing and holding the digital crown and noise control buttons will reset your AirPods Max.
Continue holding both buttons until you see an amber light and then a white light start flashing.
On AirPods and AirPods Pro, place both AirPods in the case and then press and hold the setup button on the back of the case for about 15 seconds until the status light flashes amber and then white again.
With the AirPods reset to factory settings, try once again to connect them to your device.
7. Are Your AirPods Connected To Another Device?

If you’re having trouble connecting to a particular device, consider other devices nearby to which you have previously connected your AirPods.
If that device is on, it is possible that your AirPods automatically connected to that device rather than the one you’re currently trying to connect to?
If you suspect this might be the case but are not sure which device might be the culprit, the easiest way to remedy the problem is to perform a hard reset on the AirPods as described above.
Doing this reset will deactivate all previous pairings with your AirPods.
If you do know which device might be the problem, you can go to that device and either disconnect the AirPods manually or turn Bluetooth off.
Once that is done, you should be able to connect the AirPods to the device you intended.
Note that if you’re signed in to iCloud on an Apple device paired with your AirPods, the AirPods will automatically establish pairing relationships with any other Apple device on which you have signed in to iCloud.
When this is the case, the AirPods can automatically switch between devices when you play audio.
For example, if your AirPods Pro are connected to your iPhone and then you play video on your MacBook, the audio output from your Mac will route through your AirPods.
If this is undesirable, you can disable automatic switching.
8. Your AirPods Are Dirty

If your AirPods or AirPods Pro are dirty, they might not establish sufficient contact with the case.
If so, the earphones won’t charge and you’ll be unable to place them in pairing mode.
Use a dry, soft cloth to clean the AirPods if possible.
For stubborn grime, a little bit of water on the cloth is okay.
Remember, less is more and the gentler you can be, the better.
9. Your AirPods Have A Hardware Problem

If you’re not able to connect your AirPods to any device, even after a full charge and a reset, then there’s a good chance your wireless earbuds have a hardware malfunction.
Have you dropped them recently or spilled anything on them?
Do the AirPods or the case appear to have sustained any damage?
If so, you might have your answer.
Either way, it’s worth contacting Apple, especially if the AirPods are still under warranty.
Even if they are not covered, Apple support can help you diagnose the problem and provide repair or replacement options.
Keep in mind that not all AppleCare plans cover accidental damage, and even if you are covered, there may be a deductible.
We find that chat or phone support with Apple is a better option than visiting an Apple Store—which might be miles away, depending on where you live.
If the phone queue is busy, you can schedule a callback from Apple.
Whichever route you go, make sure you have the serial number of your AirPods handy.
You can find the serial number printed on the case for AirPods and AirPods Pro, or behind the left magnetic ear cushion on the AirPods Max.
Conclusion
AirPods are tiny devices packed full of impressive (and complex) technology.
While they are usually reliable and work as intended, several scenarios can lead to the earphones not working properly.
Although such a situation can be frustrating, these nine steps will help you nail down the problem so you can get back to pure audio bliss.
NEXT: Do You Need A Mic For Discord? (Explained)