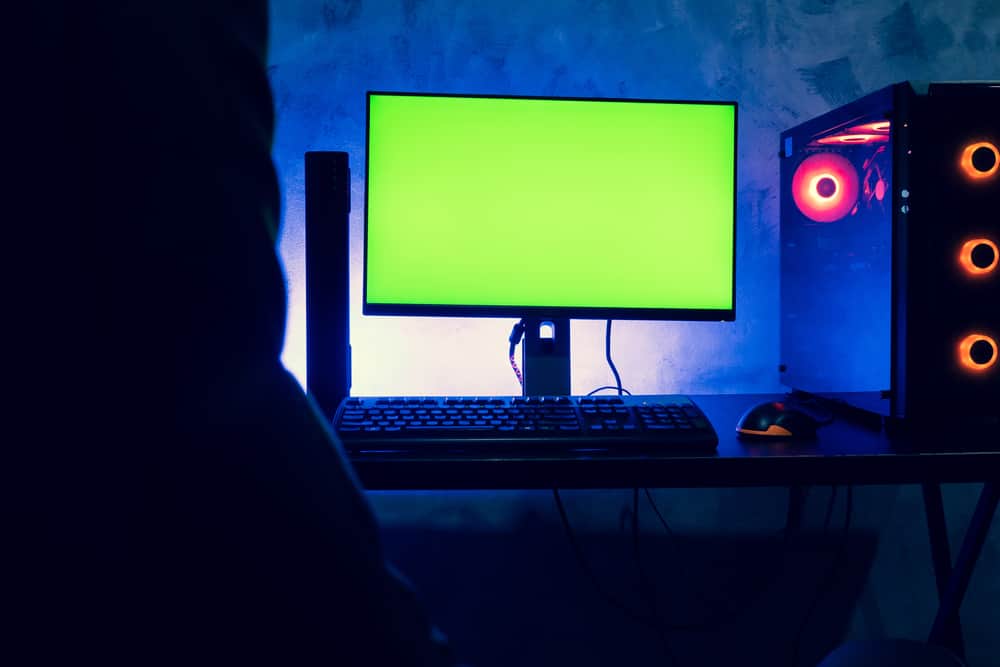
Connecting a monitor to the case is one of the easiest stages in setting up a desktop PC.
You just need to plug the display cable into the correct port and connect the monitor to the power source.
However, it’s not always that simple, and you may get no image no matter how hard you try.
Let’s explore the possible issues that prevent the monitor from connecting to the PC.
Monitor Won’t Connect To PC (Causes, Fixes)
1. Basic Issues

If your monitor can’t connect to the PC, you should start with basic and obvious solutions.
More often than not, the issue may be obvious, which we tend to neglect easily.
Here are the main ones:
A. Is The Monitor Turned On?
If you’re a seasoned computer user, having forgotten to turn on the monitor may be an improbable incident for you.
However, things happen, even if they seem obvious.
The first thing you should do is make sure the monitor is on.
It could be a possible cause if you get a black screen after turning on the PC.
Look for an LED light that indicates the monitor is on.
If you can’t see it, press the monitor’s power button again and see if you get any pictures.
Check the LED lights and see if they indicate the monitor is in sleep mode.
Move the mouse or press a key, like ESC, to wake it up.
B. Check The Connections
Another obvious factor is faulty, weak, or wrong connections.
Make sure you’ve plugged the right cables into the intended ports.
Most modern computers and video cards allow for multiple connection types.
Although each port has different cable types, people may confuse them and connect the cable to the wrong port.
Unplug all the cables, including the HDMI/DVI/DisplayPort cables.
If you’re unsure about the connection types, consult the monitor’s user manual before plugging the cables back in.
Switch between different connection types and see if you get a signal with any of them.
If you have an external graphics card, check if your display cable is directly connected to the GPU’s output ports instead of the motherboard’s HDMI output.
Plus, check the ports for dust and debris since accumulated dust can prevent the cables from making full contact with the ports.
Inspect the ports for broken connector pins since any damage in these pins can block or impair signals.
You should also check for signs of cable damage, even if your cables are brand new.
Any frayed spots, nicks, or bends can prevent the signals from reaching the monitor.
Touch the cable carefully with your fingers running along the length to ensure you haven’t missed the invisible cuts or bends.
You could also use another set of cables to connect your monitor to the PC.
This way, you can become 100% certain that the root cause isn’t faulty cables.
Alternatively, you could test the cables on another device and see if they work.
The cable type can also affect the quality of signals transferred to the monitor.
For example, you’ll need an Ultra High-Speed HDMI cable to output a 4K image.
Similarly, you’ll need a VESA-certified cable for DisplayPort.
C. Faulty Adapters
If you use an adapter to change one connection type to another, the culprit may be a faulty adapter.
You can prevent this by using a different connection type that doesn’t need an adapter and directly connects the monitor to the PC.
Make sure you’re using the adapter correctly.
For example, some of these adapters, such as HDMI-to-VGA adapters, work only in one direction.
It’s the only way you can use these adapters, and you can’t change their direction.
D. Try Another Monitor
This possibility might sound dreadful, but you have to rule it out at an early stage.
That’s especially the case if you have a new monitor and it’s the first time you connect it to the PC.
If you’ve used the monitor before, it may also be broken due to power surges or other internal issues.
The best way to make sure is to use another monitor you’re sure is working and connect it to the PC using the same cables as the faulty monitor.
If the second monitor connects to the PC, your display is broken, and you’ll need to get it repaired.
2. Wrong Input Source

When you connect your PC to the monitor via a specific connection type, it automatically recognizes the input type and syncs the hardware and software.
However, you should always ensure the monitor recognizes the input type correctly.
For example, you won’t get any signals if you’ve connected the devices through an HDMI port while the input is set to DisplayPort.
Of course, this option is only available in modern displays with various display and connection ports.
How To Fix
To set the right display input, your monitor should be able to give you access to the menu, which may be available via a button on the side or back of the monitor.
Otherwise, check the user manual and see how you can access it.
After opening the display menu, go to Input Source and cycle through the options to see the right input and hopefully get the signal back.
3. Monitor Power Issues

When your monitor doesn’t show any image, the underlying cause may differ based on the problem you experience.
For example, if you get a black screen with no signs or messages, the root cause differs from when you see the “No signal” message.
The monitor may have power issues if it shows a black screen.
How To Fix
If your monitor has power issues, you may be able to fix them depending on the severity of the problem.
It may be a simple connection issue caused by weak power cord connections.
In such cases, you can easily fix it by unplugging the power cord and plugging it back in.
Try plugging the monitor into another power source and see if it helps.
Use another power cord compatible with the monitor to rule out a broken cable.
You can also turn the monitor on without connecting it to the PC.
If it turns on, it has difficulty connecting to the PC, which requires other fixes.
If it doesn’t turn on, you must take it to a technician to find the main cause.
4. Faulty Peripherals

Faulty peripherals can cause display issues because they don’t allow the computer to boot up correctly.
These problems are even more frequent if you connect them through USB ports.
If used with wireless peripherals or USB hubs, these USB-connected devices can even cause a blue screen of death.
How To Fix
The best fix to the faulty peripherals is to disconnect them.
Unplug all the connected devices that aren’t essential in running your computer and see if the display comes on.
If you use a USB hub, ditch it and connect your essential peripherals directly to the computer.
If disconnecting the peripherals helps with the display issue, you want to find a permanent solution to connect your devices since you can’t keep them disconnected forever.
In this case, you’ll need to narrow down the problematic devices by connecting one peripheral at a time.
After finding the main culprit, you should detect the root cause.
It could be outdated drivers, which are easily fixable by updating them through Device Manager.
If it doesn’t help, you may need to replace or connect the device through another port.
5. Graphics Card Issues

Your computer needs a graphics card to deliver images and display them.
You won’t get any image if it’s faulty or not connected properly.
You can check your graphics cards in different ways.
However, in cases that you don’t get any signal from your display, you’re left with hardware checks since you don’t have access to the display’s interface.
How To Fix
For this issue, you need to physically inspect the graphics card, which requires access to the internal components.
Here’s how to do it.
Turn off your computer and disconnect all the cables and connections.
Press the power button and hold it for a few seconds to drain the remaining electric charge and avoid damaging the internal components.
You can also take extra safety measures and wear anti-static gloves.
Alternatively, you could touch a metal part of the case to ground yourself and drain the static charge.
Open the case by removing the screws and locating the graphics card.
If you have a dedicated graphics card, you can find it connected to the case’s back panel.
If it’s an internal GPU, it’s mounted on the motherboard.
However, check the user manual if unsure about the graphics card’s location.
After locating the graphics card, inspect it carefully to see if it’s fully inserted inside its dedicated slots.
You may also want to disconnect and plug it into another slot, if available.
If the graphics card’s soldered onto the motherboard, gently touch it to see if it’s come loose.
In such cases, you should take it to a technician to solder it back.
In severe cases, you may need to replace the entire graphics card if it’s damaged and not fixable.
A. Faulty GPU Fans
Dedicated graphics cards need separate fans to ensure they run smoothly and cool down efficiently.
If the fans don’t work, the GPU will run hot and prevent it from working correctly.
As a result, the GPU can’t send signals to the monitor.
Checking GPU fans can be tricky because you need to run it while the case is open.
You should first turn off the computer by following the above-mentioned safety measures.
Then leave the case open and turn on the PC.
If the GPU fans don’t work, check its connections and replace the fan if you’re convinced it’s broken.
B. Power Issues
If you’ve installed a new graphics card, you may experience the “No Signal” message from your monitor.
The reason could be faulty power connections.
Dedicated graphics cards have their own power supply cables that directly connect them to the computer’s PSU.
This setup will ensure the graphics card has enough power to drive it.
Even if the graphics card isn’t new, you may have loosened the power supply connections if you’ve opened up the case to remove other components.
These connections may also come loose over time.
Open the case and check all the connections to the power supply’s 8-pin and 6-pin connectors.
Take them out and plug them back in to ensure they’re fully inserted.
6. Outdated Graphics Card Drivers

Faulty or outdated graphics cards can affect the performance of your display devices.
That’s particularly the case if your monitor is new since there’s a higher chance that the outdated drivers cause incompatibility issues.
That’s why it’s always recommended that you have the latest drivers for your graphics cards (and other hardware components).
New updates will offer support for new display resolutions and monitors.
How To Fix
Outdated drivers are easily fixable by getting the latest updates from the manufacturer or getting Windows to download and install them automatically.
However, the catch is that you need a working display interface to follow the commands and complete the update process.
You may be able to connect your computer to a remote computer using software like AnyDesk.
This way, you can remotely access your PC software and update your drivers.
To update your graphics card drivers, go to Device Manager, find the graphics card under Display adapters, and right-click it.
Select Update driver > Search automatically for drivers.
Follow the on-screen commands to finish updating.
7. Wrong Monitor Resolution

Each monitor has different resolution sets designed for different graphical purposes.
If the screen resolution and the graphics card’s settings don’t support each other, you’ll experience clashes.
The issue is worse when the graphics card’s resolution is higher than what the screen can handle.
In rare cases, the monitor can’t connect to the PC, sending the “No signal” error.
How To Fix
If the PC can’t connect to the PC due to clashing screen resolutions, the only fix is to enter the safe mode and change the settings from there.
That’s because only the basic settings and drivers will work in the safe mode, eliminating clashing resolution settings.
The safe mode has an option to change screen resolution, but this resolution only applies to safe mode.
By changing the screen resolution, you’ll get that value the next time you boot in the safe mode and not in the normal mode.
If that’s the case, you can enable the Low-resolution Video option.
Here’s how to do it:
To enter safe mode, turn off your computer and turn it back on.
Since you can’t see anything on the screen, you must rely on your senses here.
Turn on your computer when the Windows logo appears and repeat this process three times until you see a screen that shows the computer has entered the Automatic Repair mode.
Wait for the system to look for issues to repair, and you can see a blue screen with the Advanced Options button.
Click it to go to the next window, where you should choose the Troubleshoot option.
In the new window, go to Advanced options and select Startup Settings > Restart.
Your computer will restart, and after it boots up, you’ll see a list of options from which you can select “Enable Low-Resolution video.”
The computer will then restart, and you can boot it normally with the screen working.
Now, you can go to the graphics card’s settings and change its resolution to a value supported by the monitor.
If the above method fails and you have a dedicated graphics card, you can remove it from the case.
This way, you’ll force the computer to run on the integrated graphics card.
Remember to connect the monitor to the motherboard’s slot instead of the external GPU.
When the computer boots up normally and gives you access to the interface, you can change the resolutions to match each other.
Then attach the graphics card.
8. RAM Issues

You may think that broken RAM has nothing to do with display issues.
However, since a computer is a closed system, a single issue can have different manifestations.
That’s true for RAM issues, as well.
If you’ve connected your PC to a new monitor but don’t get an image with new displays, your computer is faulty.
In such cases, you should consider bad RAM a likely cause.
Remove the RAM sticks from the slots and replace them with a good stick.
Alternatively, you can take out one stick at a time and turn on your computer (if you have more than one stick).
If you become sure that the RAM is bad, you need to replace it.
NEXT: Does Defragging Speed Up Your Computer? (Explained)


