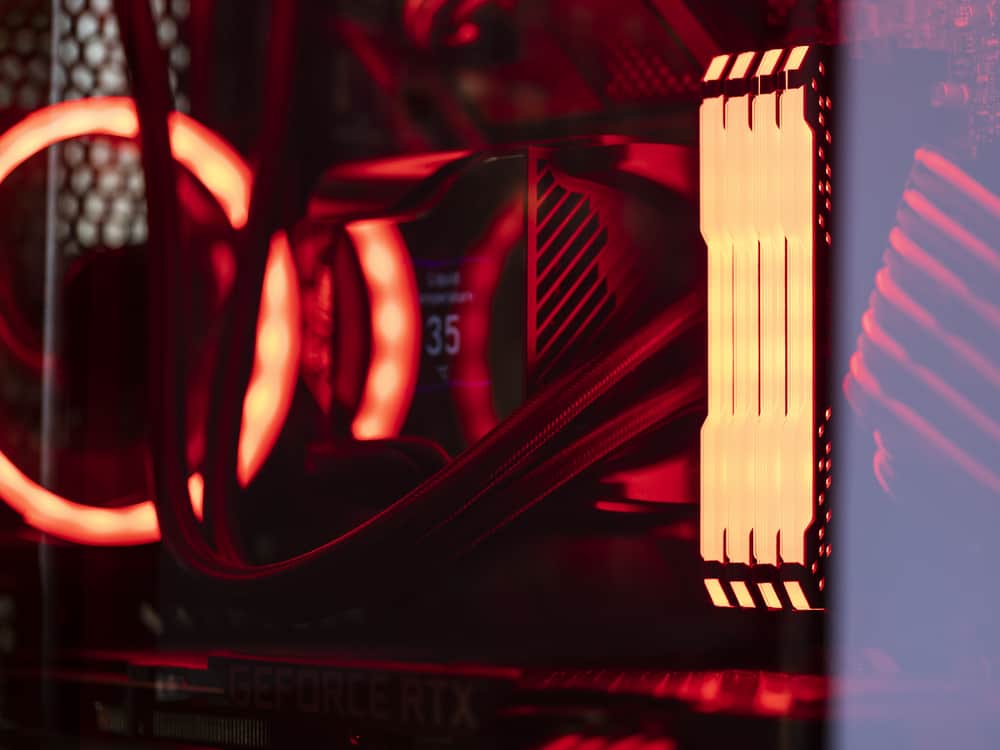
Liquid cooling gives you endless opportunities for customization.
You can choose your coolant color, tube type, radiator size and color, and more.
If you’re building your first rig, you probably have a more pressing concern: safety.
What if the liquid drips on your hardware and causes a short circuit?
What if your whole system catches on fire?
These are valid concerns, and we have the answers.
Let’s see if liquid cooling can be dangerous and how you can ensure safety if you want to build your first loop.
Is Liquid Cooling Safe?

Liquid cooling is entirely safe if you don’t have any leaks in your loop and use a proper coolant.
All-in-one (AIO) coolers are the most convenient option for those venturing into liquid cooling.
The pump, tank, cooler, and heatsink come pre-attached, so the chance of leakage is minimal.
Plus, the loop comes pre-filled with the appropriate coolant.
Things get slightly more complicated when you decide to build a custom loop that spans your CPU, GPU, SSD, and maybe even the VRMs on your motherboard.
To maximize safety, identify and fix leaks before turning on your PC for the first time.
When filling your tank and loop, cover the hardware with a paper towel.
If you see any drops of water, identify the leak’s location and fix it.
Many experts recommend distilled water for your coolant.
You should add a bit of biocide to prevent organisms from growing in your loop and hindering water flow.
However, if you’re building your first custom loop, opt for deionized water as it’s highly non-conductive and won’t damage your computer even if a leak goes unnoticed.
Note that deionized water doesn’t stay non-conductive forever.
It’ll regain its removed ions as it passes through your loop and comes in contact with the radiator.
First-timers should also avoid mixing their own coolant, as getting the proportions right is highly challenging, especially with red, yellow, and orange dyes.
If you’re building a themed rig, buy a premixed solution from a reputable brand to match the color you want.
To get a custom shade, you can also use dyes specifically designed for water cooling.
Never use food coloring as it facilitates bacteria and algae growth in your loop.
How To Make Liquid Cooling Safe

If you want to build a themed or RGB rig that’ll be the envy of your friends, you’ll have to go with a custom loop for water cooling.
1. Choose The Right Tubing And Fittings

The tubing for your loop comes in two varieties: soft and hard.
Soft tubing is easier to bend and gives you extra maneuverability.
On the other hand, hard tubing lets you create 90-degree angles, giving your rig a sharp look.
Each tubing type requires a specific fitting to prevent leaks.
Barbed fittings are designed for soft tubing.
The tube slides into the fitting and gets locked using a barb.
To ensure a perfect seal, give the tube a slight pull and ensure it doesn’t come off.
Note that the collar of the fitting isn’t responsible for sealing.
You must ensure the tube is locked into the fitting.
In contrast, you should get hardline compression fittings for hard tubings.
The O-ring on the fitting grabs the tube and creates a tight seal.
Also, your tube and fitting sizes must match.
Otherwise, leaks will be inevitable.
Finally, be careful when bending your tubes as you may cause excessive pressure to build up in the loop.
Beginners should use 90- and 45-degree fittings instead of bending the loop.
Although the finished rig won’t look as clean, these fittings significantly reduce installation mistakes and make your loop safer.
Moreover, you’ll use less tubing with angled fittings since you won’t have to waste any of it on bends.
2. Read The Instruction Manual

Each piece of equipment for your loop comes with an instruction manual.
Carefully read those manuals to avoid making any mistakes.
For example, when installing the water block for your graphics card, refer to the manual for instructions on removing the air cooler and installing the new water block.
You won’t get adequate cooling if the block’s cooling plate and thermal pads don’t come into perfect contact with the card’s components.
Your GPU may even overheat and sustain damage despite water flowing through your loop.
3. Choose The Right Coolant

As mentioned earlier, deionized water is the best coolant for first-time builders.
This type of water has undergone special chemical processes to remove all its mineral ions.
As a result, it’s non-conductive.
If it leaks, you’re much less likely to experience a short circuit.
Despite its advantages, deionized water is expensive and relatively hard to find.
That’s why many people use distilled water, which is abundant and cheap.
You need to add a bit of biocide to prevent growth in your loop.
Many people use propylene glycol, most commonly found in eco-friendly antifreeze.
The compound kills microorganisms and prevents corrosion.
Your PC coolant should contain no more than 15 percent propylene glycol as the compound is thick and has worse heat conductivity than water.
Also, note that you shouldn’t use ethylene glycol in a custom loop because the substance is toxic to humans and animals.
AIO manufacturers often use it because the loop is supposed to stay closed permanently.
If you’re going for a themed build with translucent tubes, don’t mix your own coolant.
Premixed solutions are a better option because they contain the right amount and type of biocide, corrosion inhibitor, die, and chemicals that create effects.
We also recommend avoiding two types of cooling liquids:
- Opaque solutions. These liquids tend to discolor after a few months and leave significant residue after being drained. They also build up quickly if you don’t turn on the computer for a few days.
- Red and orange colors. These solutions are notorious for clogging up the loop after a while. They’re also impossible to clean thoroughly. If you decide to change your theme, you’ll most likely have to change your tubes.
4. Prepare To Fill Your Loop

Before adding the coolant to your system, you must take a few safety precautions.
A. Unplug The Motherboard
You must disconnect the 24-pin power cable from your power supply to the motherboard.
Your reservoir comes with a jumper in the box.
The jumper’s job is to prevent the PSU from supplying 12-volt electricity when you press the power button.
This way, you can turn on the pump and fill the loop without turning on your computer.
Doing so has two benefits:
- Eliminating the air from the loop requires turning the computer on and off multiple times.
- You have a chance to test for leaks without damaging your hardware.
As long as your motherboard, CPU, and GPU don’t receive any power, you don’t have to worry about leaks.
B. Cover The Drain Valve
Before filling your loop, ensure your drain valve is perpendicular to the loop.
This position indicates that the valve is closed.
Also, put a cap on your drain plug even though there’s a valve on it.
You don’t want any seepage to get past the valve and contaminate your system.
C. Use Paper Towel
Put some paper towels underneath all your fittings and connections.
A white paper towel is ideal if you’re using a colored coolant, as water spots will be highly visible.
This paper towel will also act as a protective layer that catches potential drips.
If you spot any drips, turn off the system and leave it to dry for at least 24 hours.
Keep the computer unplugged during this period.
5. Fill Your Loop

Now, it’s time to pour the coolant into your loop.
Remember that your loop isn’t empty.
It’s already filled with air.
That air has to escape somewhere when you fill your loop, so don’t pour too much coolant too quickly.
Follow these steps to fill your loop:
- Fill your reservoir but leave a bit of space on top for air to escape.
- Turn on the system and wait for the reservoir to empty.
- Turn off the computer and refill the tank.
- Go through the two previous steps multiple times until the loop is full of coolant.
- Let the system run for about 30 minutes until the major air bubbles disappear. If the coolant level drops, add more.
- Let the system run for a few hours. Some experts recommend 24 hours, but that isn’t necessary.
Don’t turn on your computer during those few hours.
Patience is key here.
Warning: Before pressing the power button, make sure you’ve put the jumper on the 24-pin power cord.
Otherwise, pushing the button will turn on your entire system.
If there are any leaks in your loop, your hardware will sustain significant damage.
Tips For Installing Custom Water Cooling Loops

In addition to the information above, here are a few quick tips to make installing your first custom loop safer and easier.
- Start with the GPU block. This way, you can work on the block outside the case without restrictions. You’ll do a cleaner job and gain confidence for the next steps.
- Remove your RAM. Before installing the CPU block, remove your RAM to have more space to work with.
- Tighten the screws in a star pattern. When installing your water blocks, don’t tighten the screws that are on the same side. Instead, do one screw from each side to avoid putting too much pressure on one side.
- Leave some air at the top of the reservoir. This gap allows the air bubbles in your coolant to escape to the top and leave your loop without causing trouble.
- Buy extra tubing. Beginners tend to make mistakes when designing and measuring their loops. It’s not uncommon to have to redo the entire loop. Make sure you have enough tubing to correct any mishaps.
- Smooth the tube edges after making cuts. Once you cut your tubes, the edges may be rough, which may damage your o-rings and cause links. Soften both the interior and exterior edges to ensure you don’t cause leaks in the future.
- Don’t mark your tubes with sharpies or markers before cutting them. The plastic material will absorb the ink as soon as you heat the tube. Instead, estimate the cutting point using your eyes.
- Cut slightly longer than you need. After bending the tubes and accounting for the fittings, you can make the exact measurements. It’s always possible to shorten a long tube, but you can make a short tube longer.
- Don’t put on the collars and o-rings until the end of the build. It’s natural to make mistakes when installing the tubes. Leave the caps until you’re confident that the loop is complete.
- Take your time. Building a custom loop requires time and patience. Make sure you set aside plenty of time before getting started. You never know what may go wrong and how much time it may take.
Subzero Cooling Isn’t Safe (For Everyone)

Subzero cooling (aka nitrogen cooling) involves using liquid nitrogen to get your CPU temperature below room temperature even when it’s under a heavy load.
This method is only for extreme overclockers who want to set world records.
Not even passionate gamers who crank up their game settings to max will need nitrogen cooling.
The method can become extremely dangerous if you don’t know what you’re doing.
Most importantly, as your CPU temp drops below its surrounding area, you’ll experience condensation.
The phenomenon is caused by water drops forming on your hardware as the moisture in the air turns into liquid.
Protecting your hardware against condensation is an intricate task requiring significant experience and knowledge.
Beginners should strictly avoid it.
Is Liquid Cooling Worth It?

CPUs built before 2015 used to be power-hungry and generated copious amounts of heat.
In recent years, in addition to improved CPU efficiency, air cooling technology has seen some significant advancements.
As a result, fans and heatsinks have become highly effective at dissipating heat, which has left many users wondering if water cooling is still a viable option.
We need to consider the differences between liquid and air cooling to answer this question.
Liquid Cooling Vs. Air Cooling
Water’s thermal capacity is considerably more than air.
That’s why liquid cooling has traditionally been a solution for high-end machines running powerful CPUs such as AMD Threadrippers and Intel Xeon.
Water cooling has also found niche usage among avid PC builders who want to create ultimate gaming machines.
For the average user, though, air cooling is the most convenient and effective solution for a long time.
And it’ll stay that way in the foreseeable future.
Here’s a quick comparison of the two cooling mechanisms to help you decide.
A. Cost
Water cooling used to cost more in the past because it involved more parts.
However, large complex heatsinks have become increasingly expensive in recent years.
These large towers consist of many small fins and use complex materials to improve their efficiency.
At the same time, AIOs with small radiators have become more affordable.
Sometimes, an AIO may cost less than a powerful air cooler and offer better cooling due to the higher heat conductivity of water.
B. Longevity
Liquid cooling loops always lose a bit of water.
No matter how tightly sealed the loop is, some of the water will evaporate through the porous tubes and connections.
This evaporation is more troublesome in AIOs because you can’t refill the loop.
As a result, AIOs tend to last between three and five years, while you expect your custom loop to last longer, barring any complications caused by growth and poor maintenance.
In contrast, air cooling solutions can work trouble-free for up to 10 years under normal conditions.
C. Installation
A custom loop is the most complex cooling solution to install.
Although AIOs are simpler to install, they still involve a few components and require some planning.
Air cooling can also be complicated to install if you have multiple fans.
You have to be more careful when planning the airflow in your case.
And you may run into clearance problems if your case can’t accommodate the size of your heatsink.
D. Maintenance
Fans require the least maintenance, making air cooling the best option for users who don’t have time for maintenance.
Moreover, if one of the fans stops working, you can replace it without much effort.
Similarly, AIOs don’t require any maintenance.
However, you have to replace the entire circuit if something goes wrong.
Finally, with a custom loop, you have to check the pump and reservoir regularly.
If you use a coolant other than distilled water, you may have to drain the loop and clean it every few months.
Depending on the coolant, cleaning may involve taking the loop apart to scrub the tubes.
NEXT: Does My Computer Have A Camera? (How To Check)


