
Since the pandemic has started, the fight for internet capacity between family members has gotten more serious than ever.
Employees need the Internet to do their jobs and attend meetings.
Students need it to attend classes, and various devices are connected to a single router, including computers, laptops, phones, smart TVs, gaming consoles, and so on.
The issue becomes more frustrating when you find out the internet speed is much slower on your computer than the other devices.
Still, it’s a common issue, and multiple factors can impact the situation.
Read on to figure out how to get your computer back on track with the Internet.
How To Test The Internet Speed

If you want to know for sure that the internet speed is faster on one device and slower on another, you can test the speed of the Internet using online tools.
Once you open one of the following websites on your device, they’ll first show you the name of your internet service and your location.
Then they’ll start to test the internet download and upload speed and the PING, which is the response time between the PC and the Internet.
They’ll display the results after a few seconds:
Why Is The Internet Slower On One Computer?
1. Computer’s Location
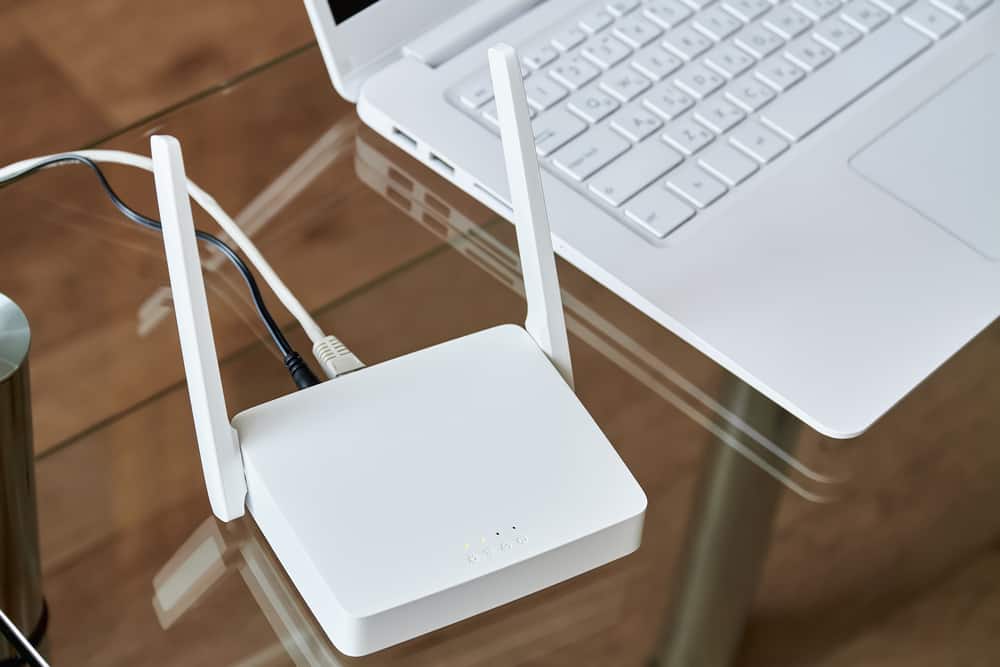
A weak WiFi signal is almost always the cause of a slow internet connection on one computer.
If you use a traditional type of router or modem provided by your ISP, you need to place it in a suitable location so that its signal reaches the entire house.
Move the router closer to your computer, or move your computer closer to the router, reducing the distance that the signals should travel to get to you.
The more distance, the more risk of slow speeds, connection problems, and dropouts will be.
Also, keep in mind that objects can interfere with connections.
Keep the router away from clutter and place it in a space that is high and open.
Don’t put it in a closed cabinet or area.
Moreover, your WiFi might operate on the same frequencies as other electronic devices emitting radio-frequency signals such as cordless phones, microwaves, TVs, monitors, and so on.
They can interfere or completely block the WiFi signals, so remove them from the area between your computer and the router and see if the connection gets better.
The best solution for any of the mentioned issues is to invest in a high-quality WiFi extender capable of boosting the signal strength and covering more area in the house.
For instance, the TP-Link AC1200 WiFi Extender can cover up to 1,500 square feet, and 25 devices can connect to it simultaneously.
Also, consider installing mesh networks, which are more modern internet solutions creating a web of nodes, and putting them around different areas of your home.
This way, every device can connect to the closest node to it and maintain a more stable connection.
2. Computer’s Health

Viruses, spyware, and insufficient browser add-ons can all impact the internet speed, in addition to other problems they can cause.
Starting with spyware, they can interfere with your browser and monopolize your internet connection, resulting in a slow system and internet.
Spyware is meant to monitor your internet use, creating delays in the process of your work.
Multiple spyware programs can significantly impact your browsing experience and even cause you to lose connection altogether.
You need to run anti-spyware programs to get rid of the infestation.
Viruses usually install computer codes that attempt to propagate themselves by sending copies of themselves through email.
Some virus types can multiply by thousands of emails per minute, leaving no more internet bandwidth for any other activity.
You need to run a trusted and capable antivirus program on your device at all times because virus infections don’t have any obvious indicators.
Lastly, some third-party browser add-ons are troublesome and can slow down your internet connection.
Disable the browser add-ons you don’t need, especially ad blockers, and see if there’s any improvement in the internet speed.
Here’s how to disable extensions on different browsers:
- Chrome: Click on the puzzle piece icon at the window’s top right corner and choose Manage Extensions from the menu.
Then, turn off all the extensions you don’t need and remove those you don’t recognize.
- Firefox: Click on the three-line icon located at the upper right corner of the screen and choose Add-ons.
Select the Extensions or Plugins you want and Disable or Remove them.
- Microsoft Edge: Click on the three dots in the top right corner and choose Extensions.
Turn off the switch next to the unnecessary extensions to disable them or select Remove.
- Safari: Click on Safari and then head to Preferences.
Hit the Extensions icon on the upper side of the screen.
Uncheck the Enable box next to each extension you don’t need or Uninstall them.
3. Troublesome Apps

Firstly, you should always be aware of the apps and programs running in the background while you’re working.
Some of them can heavily impact your internet connection and cause it to look slow.
You need a specific amount of computing power, memory space, and disk space for your computer to run smoothly.
Running programs that use up a lot of computing power and memory can compete with your web browser and affect your internet speed.
Search for “Background apps” in the Windows search bar and open the Settings menu that contains a list of them.
Go through the list and disable those that you don’t want to run in the background.
Right-click on the Windows logo and select Task Manager from the list, and open the app.
In the Processes tab, you’ll see the list of the currently running apps, and under the Network heading, you can see how much of your internet they’re consuming.
This way, you can find the faulty apps.
Moreover, some apps are designed to prioritize processes like games or videos to stream over other programs like web browsing and downloads.
For instance, AMD’s Quick Stream app is made to shape the flow of your internet traffic to favor some apps over others.
You might have that app if you have an AMD processor or graphics card, so look for the list of your installed apps and either stop it from running or uninstall it.
Other similar apps include:
- LAN Optimizer
- XFast LAN
- AVG Web Tuneup
- ASUS GameFirst
4. Corrupt TCP/IP Stack

A corrupt TCP/IP stack can be the cause of the network issues you’re having.
You can remove and reinstall the TCP/IP or reset it using the following steps:
- Type “Command Prompt” in the Windows search box and open the utility.
- Type “netsh int ip reset c:\resetlog.txt” in the field and hit the Enter key on the keyboard.
- The mentioned command will overwrite the following keys:
- SYSTEM\CurrentControlSet\Services\Tcpip\Parameters
- SYSTEM\CurrentControlSet\Services\DHCP\Parameters
- If you don’t want to determine a directory path for the log file, run this command instead: “netsh int ip reset.”
- Reboot your computer.
5. Wrong Settings

Some people have reported that setting a slower WiFi standard in the settings makes the connection run faster.
Although it may seem a bit odd, it’s worth trying and if it didn’t work for you, turn back the changes.
- Right-click on the Windows logo and choose Device Manager from the menu.
- Find Network Adapters in the list and double-click on it.
- Right-click on the name of the adapter you use to connect to the internet and select Properties.
- Go to the Advanced tab and then find the option allowing you to choose the speed or WiFi standard in the list.
- Change the value from 802.11b/g/n to 802.11b/g.
Since the network adapter is a culprit for the connectivity issues you have, it’s worth it to try the following methods to determine if it’s at fault:
- Head back to Device Manager > Network Adapters > Properties > Advanced.
- Look under the Property heading and find Link Speed and Duplex in the list.
- Ensure its Value reads Auto-Negotiation.
- Next, type “Control Panel” in the Windows search box to open the app.
- Select Network and Internet and then Network and Sharing Center.
- Click on the Change adapter settings option from the left menu bar.
- Right-click on the name of the connection you’re currently using and choose Disable.
- Please wait a few seconds, right-click on it and choose Enable.
If you don’t see any improvement in your internet speed, try running the following commands:
- Type “Command Prompt” in the Windows search bar and open up the utility.
- Type the following commands one after another in the field and hit Enter after each one.
- netsh winsock reset catalog
- netsh int ipv4 reset reset.log
- netsh int ipv6 reset reset.log
6. Outdated Drivers

Outdated or incorrect WiFi or network drivers can cause a slow internet connection, and updating them can solve the issue:
- Right-click on the Windows logo and choose Device Manager from the menu.
- Find Network Adapters in the list and double-click on it.
- Right-click on the name of your network adapter and select Update Driver.
Moreover, consider the possibility that the Ethernet connection is actually getting a sufficient signal to your computer.
Still, the applications and programs can’t use that signal effectively because of their outdated drivers.
Much like many users, you may get wonderful results by updating all your faulty drivers.
You can do this manually, but since Windows has many drivers, it’s much easier to get help from a third-party tool that helps detect all the outdated drivers and installs their latest version automatically.
Driver Easy is one of the best applications around for the job, and here’s how you should use it:
- Download, install and launch the Driver Easy app.
- Hit the Scan Now button.
- The app will display a list of all outdated or corrupt drivers in just a few seconds.
Hit the Update button next to each one, or install the Pro version of the app to update all your problematic drivers by hitting the Update All button.
- Restart your computer after Driver Easy’s job is over.
7. Peer To Peer Update
![]()
Peer to Peer Update is a feature in Windows 10 that allows users to share Windows updates peer-to-peer over the internet with other PCs.
This feature may be compromising a great deal of your internet bandwidth, so disable it if you don’t have any use for it:
- Open the Settings app and select Update and Security.
- Choose Windows Update from the left menu bar.
- Select the Advanced Options from the bottom of the page.
- Click on the Delivery Optimization link.
- Toggle off the switch next to Allow downloads from other PCs or Update from more than one place.
- Restart your PC.
8. Windows Auto-Tuning
Auto-Tuning is another Windows 10 feature meant to make more efficient data transfer possible, but it can sometimes interfere with the internet connection.
Here’s how to disable the feature:
- Type “CMD” in the Windows search bar and open the Command Prompt app.
- Paste “netsh interface tcp show global” into the field.
- Look for Receive Window Auto-Tuning Level in the list and see if it reads normal or enabled.
- If so, paste the following command and hit Ener: netsh int tcp set global autotuninglevel=disabled
- Restart the PC.
9. Large Send Offload

Large Send Offload is yet another Windows feature that is well-intended but allows background apps to consume large amounts of the internet bandwidth.
Disable LSO using the following steps:
- Open Device Manager, double-click on the Network Adapters.
- Right-click on the name of your network adapter and choose Properties.
- Head to the Advanced tab and find Large Send Offload V2 (IPv4) under Property.
- Set the value to Disabled.
- Hit OK and reboot your PC.
10. Faulty VPN

VPNs create a safe connection by adding a layer of encryption to connections between your device and remote servers to conceal your IP address.
As a result, they usually slow down the speed of your internet connection.
Not all VPNs are created equally, and the internet speed they offer is different.
Usually, free VPN suites cause more connection problems because they trade something off in return for free access, including internet speed.
Paid options are generally faster, but they can still slow down your internet at peak times.
If you’re using a VPN, always try to connect to a nearby server to lessen the time required for transmitting and receiving the correct signal back and forth.
11. Bandwidth Settings

Windows reserves 20% of your network bandwidth for Windows updates and system apps by default.
If you don’t use the Windows update feature daily, you can turn off this feature.
- Type “Local Group Policy Editor” in the Windows search bar and open the app.
- Follow this path: Computer Configuration > Administrative Templates > Network > QoS Packet Scheduler.
- Find Limit reservable bandwidth on the right side of the window and double-click on it.
- Select the Enabled option and then under Options, set the Bandwidth limit value to “0.”
- Hit Apply and then OK.
12. Hardware Related Issues

If none of the mentioned software-related solutions helped boost your internet speed, your computer might have a hardware issue that is causing your connection problems.
To determine if that’s the case, you’ll have to boot your PC into Safe Mode and check the internet connection there.
Here’s a guide Microsoft has provided for booting your computer into Safe Mode.
If you find out the problem is hardware-related, have a technician look at your computer.
NEXT: Mic Sounds Like A Robot (Causes, Fixes)


SUS
quite sus
THANK YOU!!!
My wife bought a brand new computer that was having HORRIBLE internet connectivity issues. All of the other devices measured 200-400 MBPS while hers was at 20-40. We restarted and reinstalled applications but nothing worked. Then I found this article and it stated that the wrong security protocol could be in use. So she deleted the saved connection and reconnected and BOOM it worked! Thank you so much.
Can I ask which of the solutions worked for you?