
Have you ever been working on your computer hearing your fans rev up like crazy and going silent the next second?
Do you have an app that shows you the CPU temps jumping up and down in a matter of seconds?
Is this a serious problem, or is there nothing to worry about?
Read on to learn about the causes of this issue and how you can fix them.
CPU Temp Jumping Up and Down (Causes, Fixes)

If you see your computer gets hot too often and goes above the mentioned tolerance levels, it can be alarming.
Try to keep it cool using the following methods:
1. Adjust The Room Temperature

One of the most important factors that affect the CPU temperature is the ambient room temperature.
The normal ambient temperature for optimal CPU functioning is 22–24 degrees C (71–75°F).
Working at temperatures higher than these ranges may not adversely affect the CPU, but you should reduce your CPU’s workload to ensure its optimal performance.
Otherwise, you need to try other cooling methods, such as turning on the AC or moving to a cooler place, to maintain a safe CPU temp.
2. Check The Case’s Airflow

Maintaining an optimal airflow inside your computer system can reduce its temperature.
You should maintain a balanced airflow inside the case through which the amount of air that goes into the case is equal to the amount that goes out.
You don’t want more airflow to go in than goes out or vice versa.
The fans on the front and back of your case will do the job of taking in cool air and putting out the hot air.
To ensure the best airflow, don’t place your case on a carpeted floor.
If you do this, you’ll block the fans located on the bottom of the case.
Wood or tile floors are best for bottom airflow.
In addition, try to place your PC in a well-ventilated area where enough air goes in and out.
If your room isn’t adequately ventilated, don’t put the case in enclosed cabinets inside desks because this will reduce the fans’ effectiveness.
You may also be tempted to keep the case open to allow for maximum airflow.
Although it may help to keep things cool, you’ll end up attracting more dust.
However, you can maintain ample airflow using other ways while keeping dust at bay.
3. Keep Components Dust-Free
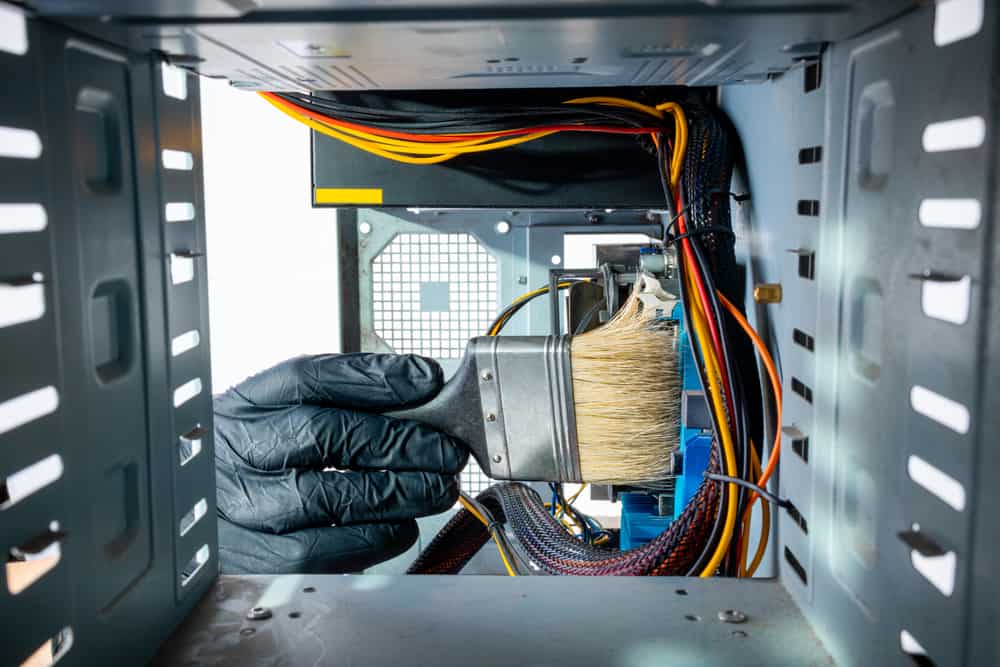
Fans and other components inside the case accumulate dust over time.
When the fan blades are dusty, they can’t move properly, and the fan can’t cool down the inside effectively.
Regularly cleaning the fans can prevent this problem.
Dust buildup makes the fan noisy, which is a sign that the fans need cleaning.
Fortunately, cleaning the inside of your case isn’t complicated: all you need is a can of compressed air and a dust mask.
Unplug the computer and unscrew the back cover of the case and remove it.
Blow the compressed air from a distance of seven inches, running it through all components, including the motherboard, fans, and power supply.
When you’re running it through the fans, keep the blades from moving by holding them with your hand.
Otherwise, you’ll damage the fans’ headers.
If you need a deep clean, you can remove the hard drive, graphics card, and CPU.
If there are some hard-to-reach places that you need to clean, you can use Q-tips dipped in isopropyl alcohol.
Making the Q-tips wet ensures better cleaning and preventing stray cotton fibers from sticking to sensitive computer parts.
Don’t forget the cover of the case itself, as it’s a favorite place for dust buildup.
Then, put the cover back on and screw it down.
4. Check The Thermal Paste

Thermal paste is the material that helps better transfer the heat between the processor and heatsink by filling the gap between the two components.
Every computer comes with thermal paste applied by default as it’s one of the most crucial things inside a computer case.
Over time, the thermal paste can go dry, reducing its efficiency in transferring heat.
Correctly applying the thermal paste can affect its ability to protect your PC from heat.
Before applying the thermal paste, it’s essential to remove the old paste completely.
You can use a microfiber cloth or cotton swab to remove the first layer of the old thermal paste.
Then apply isopropyl alcohol to the cloth and clean the chip and the heatsink thoroughly.
When the chip is completely clean and dry, place a pea-sized amount of replacement thermal paste on the processor.
Then, put the heatsink on the CPU carefully.
You don’t need to spread out the thermal paste because it will spread out naturally when you place the heatsink.
Finally, put everything back into its original position and tighten the screws.
If you see the thermal paste on the GPU needs replacement, you can follow the same steps to apply the new thermal paste.
However, you need to be more careful because you should open the screws on the graphics card.
Don’t apply pressure when removing the cover, or you’ll damage the fragile parts, including the fan power plugs.
Some GPUs have thermal pads that you can replace.
However, you need to replace them with pads of the same thickness and dimensions.
Therefore, it’s better to steer clear of that.
When you’ve removed all the screws, clean the GPU and the fan with the microfiber cloth.
After applying the thermal paste, just like you did with the CPU, replace the cover, tighten the screws, and ensure everything is carefully in place.
Finally, install the GPU on the motherboard and close the case covers.
5. Run A Malware Scan

Malware or virus infection can lead to increased workload, making your CPU work harder and getting hotter.
If you see higher temperatures, especially during idle times, it helps to run a malware scan.
This way, you’ll at least rule out this possibility and make sure the malware doesn’t use your PC’s resources.
6. Don’t Overclock

Overclocking refers to increasing the speed and performance of your CPU.
This can increase the temperature as it leads to more CPU heat.
Although overclocking doesn’t make your CPU hit the temperature threshold, it’s safer to keep your temperatures well below 80 degrees.
You can use different ways to control the heat, although the stock heatsink and the fan that come with your PC should do the trick.
However, you can invest in more efficient cooling systems as they’re designed for normal use.
For example, you can get a more efficient aftermarket CPU cooler.
You can get a better version of your stock cooler or get a liquid cooler.
Both of these are easy to install, but you need to make sure they fit your case’s size and the CPU’s sockets.
Another piece of equipment that can help you cool down your CPU is a case fan.
If there are only two case fans installed in your case, you can increase the number to three or four.
This way, you can increase the airflow.
That said, you need to make sure the direction of the added airflow complements the existing one.
That’s because you need to have fans that take in the cool ambient air and take out the warm inside air.
If your case isn’t big enough to accommodate more fans, get a bigger case.
The location of the new fans also matters.
If you don’t put them in the right place, you’ll end up trapping the hot air inside, raising the temperatures even higher.
As mentioned earlier, the front fans take in the cool air, and the back fans push out the hot air.
In addition, the direction of the fan blades is important in driving the air out.
Each fan has an open side and a grille side.
The front fans that take in the cool air should have their open side facing outside the case.
Conversely, the back fans that drive out the hot air should have their open side facing inside the case.
You could also place the exhaust fans on the top.
7. Increase Your Fan Speed

Although fans seem to be a piece of hardware that runs at a fixed speed, you can boost their speed via software.
In this case, they have to be attached to the motherboard.
If they come connected to the power supply, you can speed them up via a hardware fan controller.
On Windows 10, you have the option to adjust the fan speed via the BIOS.
On other versions of Windows, you need to use third-party software, such as SpeedFan.
8. Rearrange Your Case

The way you arrange the components inside the case greatly affects the airflow and how cool it can get.
The biggest culprit here is the wires randomly running through the case and messing up the whole system.
A modular power supply can help you control the wires and keep the case organized.
Another thing you should consider is the placement of the heatsink.
This is especially true when you don’t see any improvements in the heat regulation after applying new thermal paste.
In such a case, the heatsink isn’t completely touching the processor and creates excessive heat.
The issue is easy to fix, though.
All you need to do is to remove the heatsink and put it back on the processor.
This time, make sure to align it with mounting points located around the processor.
Then, depending on the heatsink, fix it using tabs or a screwdriver.
How To Check CPU Temps?
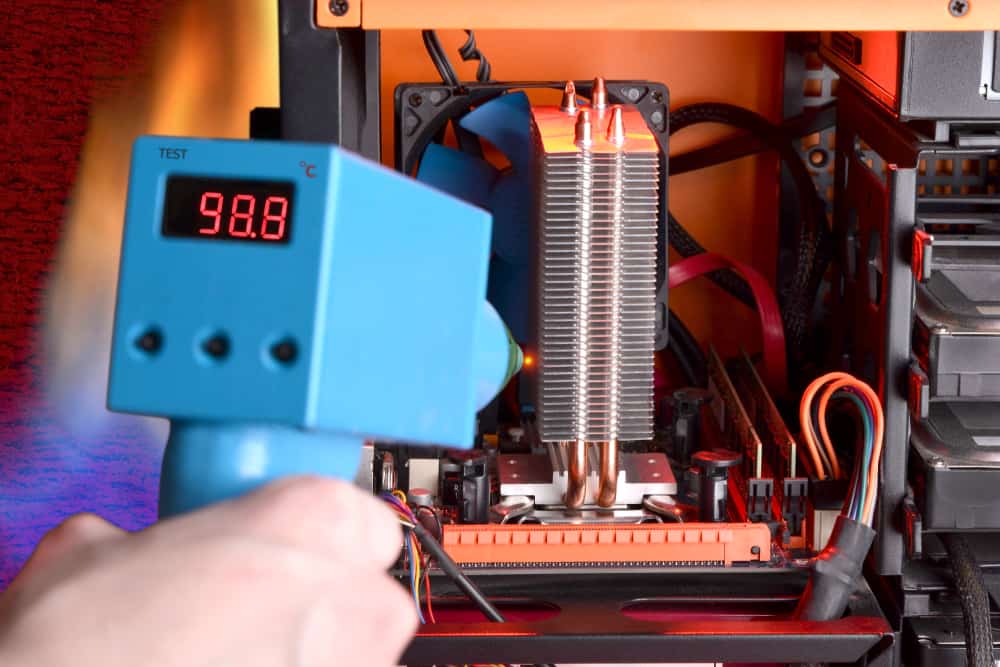
As we said, CPU temps jumping up and down aren’t as serious as the temperature ranges.
To ensure your CPU temps are normal, you need to monitor them constantly and fix any potential issues.
While you could listen to your fan working all the time, it seems primitive and can’t give the exact values you want for this purpose.
Plus, the culprit may be a faulty fan, so you can’t trust it.
The best way is to use third-party software that monitors your CPU temps.
One of them is Core Temp, which goes into the Windows system tray and keeps track of CPU temps in real-time.
Another app is HWMonitor, which is perfect for gaming PCs.
It keeps track of your CPU’s high and low temps in real time, monitors your fan speed, and analyzes many related variables, such as clock speed.
While HWMonitor can be hard to use for the average user, CAM is relatively simple to use.
It gives you real-time information about the temperature, clock speed, and fan functions.
You can also use this free software to change the clock speed.
You could run a stress test using Prime95.
Stress testing means driving your system’s performance up to its full capacity and seeing how your system holds up under this intense condition.
Then, you can monitor the temps and see how high they get.
Do I Need To Worry About CPU Temperature Fluctuations?

Heat is a natural byproduct of electricity, and every electronic device produces some degree of heat when in operation.
Your computer also gets hot as the normal operations of your CPU generate temperature.
CPUs get hot and cool surprisingly fast, in a matter of seconds.
Your operating system can regulate the temperature automatically, so you don’t need to worry about your CPU getting too hot.
The CPU can generate heat in different operating phases, even when it’s idle.
When several CPU-intensive tasks run simultaneously, the temperature rises dramatically and quickly returns to normal.
When you see CPU temp jumping up and down like crazy, most of the time, it’s not a big issue, even when you’re not running any programs.
That’s because background programs are running and make the CPU get hot.
When they stop running, the temps quickly go back to normal, and you may consider it an odd fluctuation.
Even if you see different cores having different temperatures, it would be normal.
The main reason is that different cores are made of different materials, and the cooler paste around them may be of different thicknesses.
Plus, each core does different chores assigned to it by the operating system.
It’s not uncommon to see different cores having different temperatures at the same time.
You may also hear the fans working and making more noise than usual.
You’ll see these fluctuations, especially during the first minutes of running the computer.
As long as they stay within a specific range, these temperature fluctuations are fine.
What Is A Normal CPU Temp?

As we said, CPU temperature fluctuations aren’t uncommon due to the background processes running and stopping constantly.
You should be worried about how high these temps get and how long they stay in these hot states.
As a rule of thumb, the following ranges are acceptable for CPU temperature during various workloads:
- Idle. When you turn on your computer but don’t open any programs or apps, your system is idle, and nothing intensive is running. In this case, the temperature should be between 30 and 40 degrees Celsius (86–104 degrees F).
- Heavy load. When you open several CPU-intensive programs at the same time, your computer is under heavy load. Depending on your CPU’s make, the maximum temperature for heavy load may vary. Generally, it’s up to 95 degrees C (203 degrees F), and it’s always recommended that you should keep the maximum temperature 30 to 35 degrees below the allowed threshold to avoid shortening your device’s lifespan.
Modern CPUs can endure temperatures of up to 100 degrees C (212 degrees F) and work at their full capacity even at this temperature.
You need to make sure the temps remain below this limit because other components aren’t that resistant to heat.
However, if you’re an average user, you don’t need to worry about going over the tolerance level.
That’s because computers have a fail-safe that curbs the CPU as soon as it gets hotter than its threshold.
That’s why you may see your computer shut down unexpectedly when maxed out.
The CPU Temperature Threshold For Gaming

Gaming is one of the most CPU-intensive tasks that can ramp up your device’s temperature considerably.
Modern games are more GPU-intensive than CPU, so they generate heat in the GPU.
Regardless, gaming can put a lot of stress on most of your hardware components as they have to work at their peak performance rates.
However, it doesn’t matter if your gaming uses the CPU or GPU to perform.
Your CPU temperature shouldn’t get higher than 80 degrees C (176 degrees F).
This threshold applies to all CPUs, be it Intel or AMD.
If your CPU reaches that temperature while you’re gaming, you should take measures to cool it down.
NEXT: Monitor Goes Black For A Second (Causes, Fixes)


