
Restarting your computer is the first go-to option when you face an issue in your system.
It can remove temporary glitches and save you the trouble of going through lengthy fixes.
When restarting your computer is the main issue, though, it seems you have nowhere to go!
If your PC takes too long to restart, what should you do?
Fortunately, there are many things you can do.
Computer Taking Forever To Restart (Causes, Fixes)

When your system is stuck on the restart window, you get locked out of your system because no commands or combination keys work.
You need to first exit this screen and access the main interface.
Otherwise, you can’t find and fix the underlying issues.
In addition, the computer may take forever to restart due to a temporary glitch rather than a serious issue.
As a result, you need to hard-reboot your computer, turn it on normally, and then look for the underlying factors that caused the issue.
To do so, press the power button and hold it for six seconds until the computer turns off.
If it doesn’t shut down on the first try, repeat it several times until you can get it to shut down.
Alternatively, you could press the X key and Power button on your laptop and hold them until the computer shuts off.
Then, start your system normally and look for the underlying cause.
1. Hardware Issues
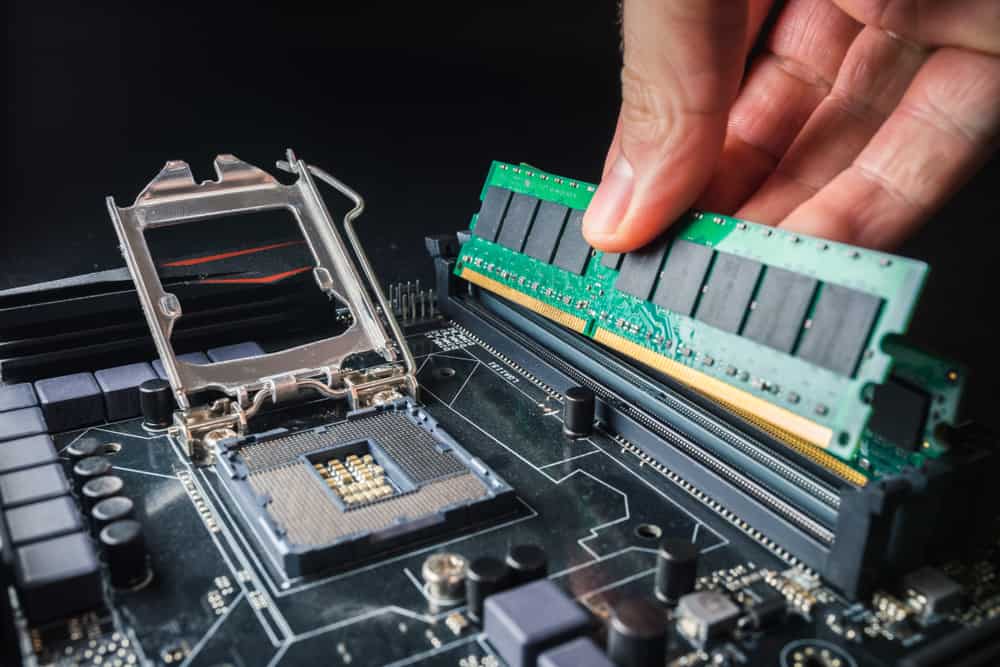
If you’ve recently added new hardware or peripherals to your computer, you may face incompatibility issues.
It could be a new RAM stick, a storage device, or a printer.
If the new device isn’t compatible with your entire system, it can cause many issues, including a problematic restart.
They may also mess with the computer’s PSU, preventing system components from getting power.
How To Fix
If your problem appeared after adding a new piece of hardware or peripheral, there’s a high chance it’s the main culprit.
Start with disconnecting that component and restarting your computer.
If the PC restarts normally this time, you should troubleshoot the peripheral.
Start with updating its drivers after reconnecting it and see if it helps.
Then, you should rule out any connection issues that prevent the components from getting enough power.
You may want to physically inspect the component and make sure it’s properly connected to your PC.
If you haven’t recently added a new component to the system, you should consider other peripherals.
Disconnect everything, including the mouse, keyboard, storage devices, USB devices, etc., and try restarting your computer.
If you can restart it normally, it means the peripherals are faulty, and you should start with updating their drivers.
Go to Device Manager, right-click the device, and select Update driver.
Ideally, you may want to update all the drivers listed in Device Manager since the problem may be due to a driver conflict.
One of the devices in the device manager that has been known to cause system crashes on startup is the Intel® Management Engine Interface.
Many users have reported that disabling this device helped them solve their restart issue, but you can try updating its driver and disable it if it doesn’t help.
You can access it via Device Manager > System Devices.
2. Fast Startup

Fast Startup is a Windows feature that allows it to boot up faster, especially if you launch your OS from a hard disk drive, which is slower than an SSD.
With this feature enabled, your computer doesn’t fully shut down when you use the shutdown command.
Instead, it goes into a state of hibernation, allowing it to boot up faster.
However, this feature can cause issues because it takes up hard disk space and may prevent the power button and fans from working properly.
How To Fix
Although the fast startup is a harmless built-in Windows feature, you may want to try disabling it and see if it helps with your restart issue.
To disable the feature, right-click the Start button and select Power Options.
You can access it through the Control Panel if it’s unavailable there.
Select Additional power settings on the right side of the window and click on the Choose what Power buttons do link.
Select Change settings that are currently unavailable and remove the checkmark next to Turn on fast startup (recommended).
3. Background Processes

Windows always has some services running in the background, some of which are essential in running and maintaining the entire system.
However, some of them aren’t essential, and we may never use them.
They just hog the system resources and potentially interfere with the normal functioning of your system.
Usually, a restart can end these processes if they’re messing with normal operations.
However, they may refuse to close and delay or interfere with the normal shutdown of your system.
How To Fix
First, you must see if some processes will not let Windows shut down or boot up successfully.
To identify them, right-click the Start menu and select Event viewer.
Select Applications and Services Logs on the left panel and click on the Microsoft folder.
Expand the menu under Windows and scroll down to Diagnostics-Performance.
Right-click it, select Open, and click on Operational.
Right-click the Operational log on the left panel and click Filter Current Log.
Go to the All event IDs section and enter 203.
By clicking Ok, you can see all the processes that were open during the shutdown.
Look for the events labeled This service caused a delay in the system shutdown process.
However, these processes may not be the only problematic ones because there may be some processes that don’t let Windows startup normally.
You can identify them through the same steps.
The only difference is that you should enter 103 instead of 203 in the Event ID section.
After identifying the problematic processes, you need to ensure they’re not essential in running your system, and you can terminate them.
Search each process and see if you can kill it to help Windows boot normally.
4. Startup Programs

Software conflicts may not only be in the background processes.
When you boot your computer, some essential programs and services should launch immediately to let you access the features easily.
However, some third-party programs alter their settings to launch upon startup, although it’s unnecessary.
What’s more, they may mess with the proper startup of your system, making the PC unable to restart properly.
How To Fix
You can find startup programs in the Task Manager, which you can access by right-clicking the Start button.
Once in the Task Manager window, go to the Startup tab and see the list of programs that launch upon startup.
You can see the importance of each program under the Startup impact column.
Disable all the third-party apps you don’t need to open when you start the computer.
You can disable these problematic startup programs through the System Configuration app.
Type it in the taskbar’s search box and open the first result.
Go to the General tab and enable Diagnostic startup.
Click Apply > Ok.
Now open the Run box by pressing the Windows key and R, type in services.msc, and press Ok.
Find Cryptographic services and double-click it.
Select Stop.
Now go to the Startup type section, expand the dropdown menu and select Disabled.
Click Apply and then Ok.
Return to the Services window, double-click Geolocation Service, and select Stop.
Again, go to Startup type and select Disabled > Apply > Ok.
Now, restart the computer and see if it boots normally.
5. Windows Update Issues

Like drivers and programs, your operating system should also be its latest version to ensure it runs optimally.
You may run into different issues if your Windows version is old and you haven’t updated it for a while.
Although Microsoft regularly pushes these updates and automatically installs them on your computer, some of the optional updates may not have been installed due to storage issues.
How To Fix
Installing the latest Windows updates is easy.
All you need to do is go to Settings > Windows Updates.
Check for new updates and install optional ones, too.
However, your issue may be due to a recent update introducing bugs into your system.
That’s particularly the case when Windows can’t restart after installing the updates and goes into a boot loop.
You can check this by searching online forums and seeing if other users have the same problem.
If that’s the case, you can’t do anything except wait for Microsoft to introduce the next updates.
Until then, you can uninstall the current update.
To do so, go to the Windows update window and scroll down to View update history > Uninstall updates.
Look for the problematic update, right-click it, and uninstall it.
6. BIOS Issues

The BIOS is firmware that ensures your computer can boot properly through hardware initialization.
It loads the hardware upon bootup and ensures the operating system can load without issues.
If BIOS doesn’t work properly, you’ll experience issues with restart since it can’t boot up the system.
How To Fix
If your BIOS has issues, the best fix is to update it.
However, updating BIOS is a sensitive task and requires specific technical skills.
If the process of updating gets interrupted for any reason, the BIOS will get damaged.
If you’re not technologically savvy, it’s better to leave it to a skillful technician and do it as a last resort.
Before updating the BIOS, you need to know its current version.
Press the Windows key and R to open a Run box and type in msinfo32.
After getting the BIOS date and version, go to the manufacturer’s website and download the latest version.
Follow the instructions given by the manufacturer to download and install the updates.
7. Software Distribution Folder

Another issue related to Windows updates preventing them from installing correctly is the Software Distribution Folder.
This temporarily stores the files required for installing new updates, ensuring your PC gets the latest bug fixes and improvements and remains secure.
Most general users don’t know about this folder because it performs its duties normally in the background.
However, in some rare cases, you may need to empty this folder because the download and datastore folders can’t sync.
As a result, Windows can’t apply new updates, leading to problems after Windows updates, like restarting and getting stuck.
How To Fix
Clearing the Software Distribution folder is generally safe because Windows will automatically download all the necessary contents.
To clear this folder, open a Command Prompt window and run it as administrator.
Type in net stop wuauserv and press Enter.
This command will stop the Windows Update Service.
Next, type in net stop bits to stop the Background Intelligent Transfer Service.
Now open the File Explorer and go to this path:
C:\Windows\SoftwareDistribution
Select all the files inside the folder and delete them.
Now start the Windows Update Service by entering the following command in the Command Prompt:
net start wuauserv
Type in net start bits to start the Background Intelligent Transfer Service.
After this command completes, Windows will restore the files, and hopefully, your update will take effect.
8. Wrong Virtual Memory Settings

Virtual memory is a portion of your physical storage on the hard disk that your system will turn into temporary storage.
It can help RAM do its job better if you run many programs simultaneously, maxing out the RAM capacity.
While it’s a greatly helpful feature, virtual memory settings can go wrong and affect your system’s bootup and restart process.
How To Fix
To check the virtual memory settings, open the File Explorer, right-click This PC, and select Properties.
On the right side of the About window, click Advanced system setting and click Settings under Performance.
Go to the Advanced tab and click Change under Virtual memory.
At the bottom of the window, you can see three values: Minimum allowed, Recommended, and Currently allocated.
The last two options shouldn’t be unnaturally different.
Although Microsoft allows the size of virtual memory to be up to three times the size of your RAM (up to 6,000 MB), you may want to lower that and see if it helps.
Uncheck Automatically manage paging file size for all drives and select Custom size.
Set the initial and maximum size values equal to the recommended values, confirm changes, and reboot your computer.
Note. Since changing the virtual memory size may affect your storage, back up your sensitive data before proceeding.
Run The Troubleshooter
Windows has a built-in tool that allows you to identify and fix problems if you can’t find any specific cause.
To do so, go to Settings > Update & Security > Troubleshoot > Additional troubleshooters.
Scroll down to Power, select it, and click Run the troubleshooter.
Alternatively, you can use the System Maintenance Troubleshooter through Control Panel > Troubleshooting > View all > System Maintenance.
Click Next and follow the on-screen prompts to finish the troubleshooting process.
Another troubleshooting tool you can run is the Performance troubleshooter, accessible through the command prompt.
Open a command prompt window and run it as administrator.
Type in exe /idPerformanceDiagnostic and hit Enter.
The command may take a while, but it can fix performance-related issues.
9. Other Fixes

If none of the above solutions help your system restart normally, try the following solutions.
A. Use The SFC Scan
You may have corrupted system files that don’t allow your computer to restart and boot.
Running a System File checker scan can help detect and fix these files.
To run the SFC scan, open a command prompt and enter sfc /scannow.
It may take a while, so be patient, and the system will do its job.
Alternatively, you could run the chkdsk utility to check the health and integrity of your hard drive.
Remember, it could take a while, so you may want to perform the scan when you have enough time.
Open the File Explorer and go to This PC.
Right-click the drive you want to scan and select Properties.
Go to the Tools tab and click Check.
B. Disable Your Antivirus
If you have a third-party antivirus tool, you may experience software conflicts that cause many problems across the board.
First, run a thorough system scan to ensure your computer isn’t infected and disable the antivirus.
Restart your computer and see if it boots normally.
In that case, you may want to change your antivirus tool to avoid these conflicts.
C. Upgrade Your Storage
When you start your computer, a copy of the operating system moves from the hard drive to RAM so that the processor can perform tasks faster.
This process may take longer if you have a physical hard drive because these storage devices are slow due to their moving parts.
You can get faster bootup times by upgrading to an SSD and storing your operating system on it.
D. Use The Clean Boot
A third-party program may be causing the restart issues.
You need to isolate it using the Clean Boot, which runs the system with a minimal number of drivers and apps.
Type System Configuration in the search box and go to the Service tab.
Check Hide all Microsoft services and click Disable all.
Restart your computer, and if the issue has disappeared, you need to find the problematic third-party program by enabling them one by one.
E. Reinstall Windows
If nothing helps you get your system to restart normally, you may want to re-install your Windows.
The underlying cause may be an unknown OS issue you can’t find or fix.
You can get a fresh copy of Windows by reinstalling it.
Alternatively, you could factory reset or restore your Windows, depending on your preferences and conditions.
By factory resetting your Windows, you won’t lose your files, but all your third-party programs will be deleted.
A system restore may be a better option because it will return your OS to a previously good state.
You can access both options through Settings > Update & Security > Recovery.
NEXT: How To Clean USB Ports (Step-By-Step)


