
Random restarts are frustrating on their own, even if they occur without showing a blue screen of death (BSOD).
You’ll lose your unsaved projects, muddle up your tasks, and get discouraged to continue working.
Most importantly, it’s probably a sign of a more severe problem that can cause further disasters if left unchecked.
You want to know why your computer is caught in a reboot cycle and how you can fix it.
Read on to discover a few possible causes and learn how you can fix them.
Computer Randomly Restarts—No Blue Screen (Causes, Fixes)
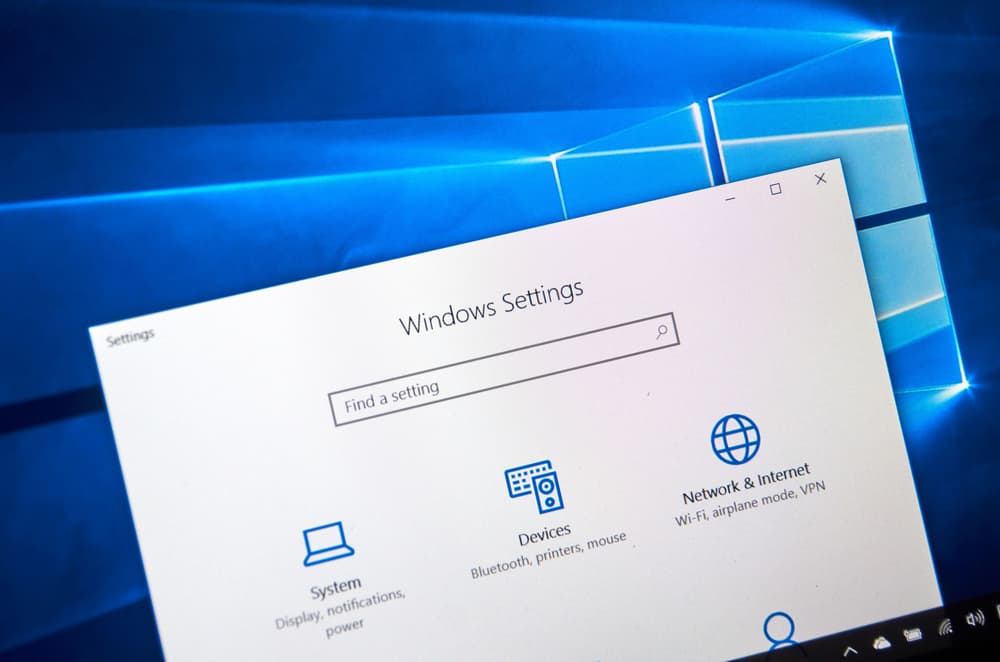
1. Identify The Issue In Safe Mode

Safe Mode is a diagnostic feature that disables the non-essential features, apps, and services.
In this mode, all the third-party tools, additional drivers, settings, and potentially, malware will stop operating.
This way, you will know if the difficulty is system-critical or something external.
Here’s how you can run your PC in Safe Mode:
- Go to the Start menu at the bottom left of the screen.
- Then, press the gear symbol in the left side ribbon to open your Windows Settings.
- Scroll down to “Update and Security” and select “Recovery” from the left panel.
- Press “Restart now” in the “Advanced startup” segment.
- A new blue screen will appear and prompt you to choose an option.
- Select “Troubleshoot,” “Advanced Options,” and then “Startup Settings” sequentially.
- A list of reboot options will appear; press F4 on your keyboard to choose the “Safe Mode.”
- Hit the Restart button at the bottom right.
Let your PC operate in this mode for an hour or so.
If it doesn’t restart unexpectedly, you should find the source of the problem in the installed drivers, apps, viruses, etc.
If it continues to behave the same, chances are you’re facing a hardware or Windows problem.
Therefore, it’s wise to skip the next eight solutions and start from “Check Your CPU Temperatures.”
How To Exit Safe Mode
Before trying to figure out the root cause, you need to go back to its normal mode of operation:
- Use your keyboard to press R + Windows keys simultaneously.
- Once the Run dialogue box opens, type “msconfig” (without quotation marks) and hit Enter.
- After switching to the Boot tab, spot the “Safe Mode” and unmark it.
- Click OK and wait until the Windows loads normally.
2. Switch Off Auto Restart

Microsoft has an Automatic Restart feature that, when enabled, lets Windows automatically reboot itself whenever it runs into a serious software issue.
If your problem has something to do with your programs, you won’t get an unexpected restart after disabling this function.
Instead, your PC communicates the issue through an error message on your display.
Here’s how to turn this function off:
- Right-click on “This PC” (or whatever you named it).
- Select “Properties” from the drop-down list to go to “Advanced System settings.”
- In the new window, jump to the “Advanced” tab.
- Click “Settings” below the third category (Setup and Recovery).
- Spot what says “Automatically restart” below the “System Failure” section and clear the checkbox beside it.
- Hit OK to save your changes.
Note: Although this method may come to the rescue, it’s not a permanent fix to your problem.
It’s just a diagnostic way to get to the bottom of your error.
Your next step would be searching through the apps, finding and troubleshooting the main cause.
3. Remove Newly Installed Programs

If disabling Auto Restart did solve the case, you should start diagnosing the problem by uninstalling your recent apps.
The issue may be caused by a trojan crashing your computer or just a file or app.
Here’s how to remove apps from your PC:
- Access your Control Panel by typing its name in your Windows search bar.
- Go to the “Programs and Features” section.
- All the existing apps will be listed in front of you.
- Sort the options by their installation date (Right-click on the screen, click Sort by > Installed On > Ascending).
- Look for every program that you installed around the time you came into the random restart issue.
- Right-click them one by one and press “Uninstall.”
If this seems to fix the problem, you may also want to use your System Registry to clear all its footprint.
This will minimize the chance of recurrence.
4. Roll Back Your OS Updates

Although faulty installations are more common with manual setups, automatic Windows updates can also fail and disrupt your system as a result.
It’s worth uninstalling updates to see if your PC reverts to normal.
- Press the Start icon at the screen’s left corner and tap on the gear symbol to open Settings.
- Head to “Update and Security” and press “View update history.”
- Click “Uninstall updates” from the top.
- Choose recent updates that have occurred before the no-warning restarts.
If your system seems to work fine after this reversal, you can update it again through Settings > Update and Security > Windows Update.
5. Perform A Virus/Malware Scan

Different types of malware and viruses can have various adverse effects on your computer, and random reboots are among the most signs of virus infection.
It’s wise to use a powerful antivirus app and search for possible threats before going through more complicated troubleshooting.
6. Go To A Previous Restore Point

Restore Points are snapshots of your system settings, drivers, apps, and registries at a specific time.
Whenever you’re about to add an element to your computer, it automatically records the beforehand state so you can flashback to the previous configuration if you weren’t happy with the changes.
If your random restarts are caused by a software or a non-default component, reverting to a restore point may help.
- Type “system restore” in the search field at the bottom, and open the top result, “Create a restore point.”
- (Alternatively, Press the Window + R key and input “rstrui.exe” in the command box).
- The new window will pop up on the “System Protection” tab. (If not, make sure to move to this tab.)
- Press the “System Restore…” button.
- Click Next to view the list of previously saved points.
- Look at their corresponding dates and decide which one you want to recover.
- Mark your choice and accept the following prompts to verify you know all the consequences.
- Then Press Finish and wait until the process completes.
Note: If the System Restore button is disabled, it means your computer doesn’t have a restore point, maybe because you’ve canceled their automatic creation at one time.
7. Update Or Reinstall Drivers

Computer drivers are a type of intermediate software that interprets a piece of hardware for the OS.
They tell your system how to recognize a component and act accordingly to fulfill its functions.
However, if these drivers become corrupt, obsolete, or incompatible with your device, they lose track of the hardware and may begin to misbehave.
Constant unpredicted reboots can be one of the many blunders.
Usually, graphic card drivers cause such an issue, but you have to update all drivers to ensure they’re not to blame for your headache.
Here’s how:
- Access the Device Manager through your system search box.
- Your device drivers are classified by their categories (such as Display, Audio, Network, etc.).
- Click the arrow to expand your desired category and right-click on the driver you want to update.
- Press “Search automatically for updated driver software,” and then “Update Driver.”
Note: If nothing changes, uninstall the driver and use the device manufacturer’s website to reinstall it.
8. Disable Fast Startup

Fast Startup, which is available in Windows 8 and above, lets you shorten the boot-up duration.
In a nutshell, it maintains your current state of OS while shutting down the PC and puts it in hibernation mode, so you don’t have to start everything from scratch.
However, computers that don’t support hibernation mode may act strangely when this feature is on.
Besides, it may develop compatibility issues with encrypted files or apps on your computer.
It’s worth disabling this feature to see if your computer resumes unusual restarting.
- Reach your Control Panel by searching its name in the Start menu.
- Find and click “Power Options.”
- Go to “Choose what the power buttons do” from the left pane.
- Click the blue link that says, “Change settings that are currently unavailable.”
- Under the “Shutdown Settings” category, unmark “Fast Startup.”
- Don’t forget to save your changes.
9. Alter The Power Settings
Processor Power Management is a section in your computer settings that lets you manage how much power your CPU consumes when it’s performing at its minimum.
Although this feature is helpful for energy-saving purposes, it can interfere with some OS-level functionalities if you set it too high or low.
That’s why tweaking this setting could overcome random restarts for many users.
Here’s what you should do:
- Right-click the battery symbol at the right end of the taskbar.
- Press “Power Options.”
- All three checkboxes in the window (Balanced, High Performance, and Power Saver) have a blue link on their right side that says, “Change Power Settings.”
- Press the one next to your already-selected plan.
- Now, click “Change Advanced Power Settings.”
- Scroll down the list to locate “Processor Power Management.”
- Press the plus icon beside it and expand “Minimum Processor State.”
- Set it to 5% for both “plugged in” and “on battery” indexes.
- Restart your PC and check if the issue lingers.
10. Check Your CPU Temperatures
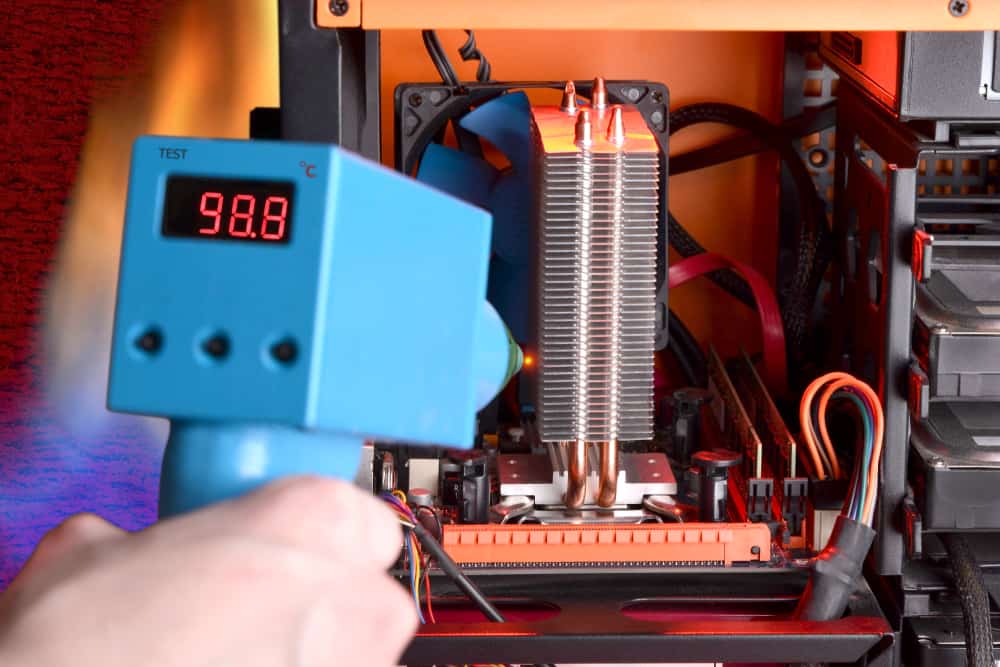
Does your computer happen to restart whenever you’re gaming or using a CPU-intensive application?
If so, an overheated CPU is most likely what is causing your issue.
When your processor gets too hot, your computer becomes unstable, and you may see unusual interruptions such as abrupt restarts.
Use an assistant tool such as Everest or HWMonitorPro to check your CPU temperatures.
Alternatively, you can apply your motherboard’s built-in interface—BIOS.
Run whatever program you usually use, and then check the temperatures.
If the numbers hit 80 degrees Celsius or higher, go with the following workarounds:
- Open up your computer chassis to ensure your CPU fan is still working.
- Repair your fan, change the thermal paste, or buy a more heavy-duty cooler for your CPU.
- Use a compressed air can or a similar tool to clean your CPU fan.
11. Ensure Your PSU Is Fine
As its name suggests, your power supply component (PSU) takes care of supplying your hardware with enough electrical power.
If it fails, your system won’t have the energy to perform its many functions and may reboot.
To confirm this is causing you trouble, borrow a friend’s PSU and see if the issue recurs.
Then, try these methods to fix it:
- Check all the connected wires, and replace them if they seem corroded or old.
- Ensure your PSU fans remain in good condition and replace them if necessary.
- Remove any grease and dust from your PSU.
- Test your battery voltage via a voltmeter and ensure it’s not surpassing the authorized limit (you can also access the voltage through BIOS).
- Use a power supply test software.
- Make an overall diagnosis and buy a whole new component if none of the above works.
Note: If you don’t have technical knowledge and experience, handling the PSU could be dangerous.
It’s advisable to have a professional do the tests.
12. Check Your RAM
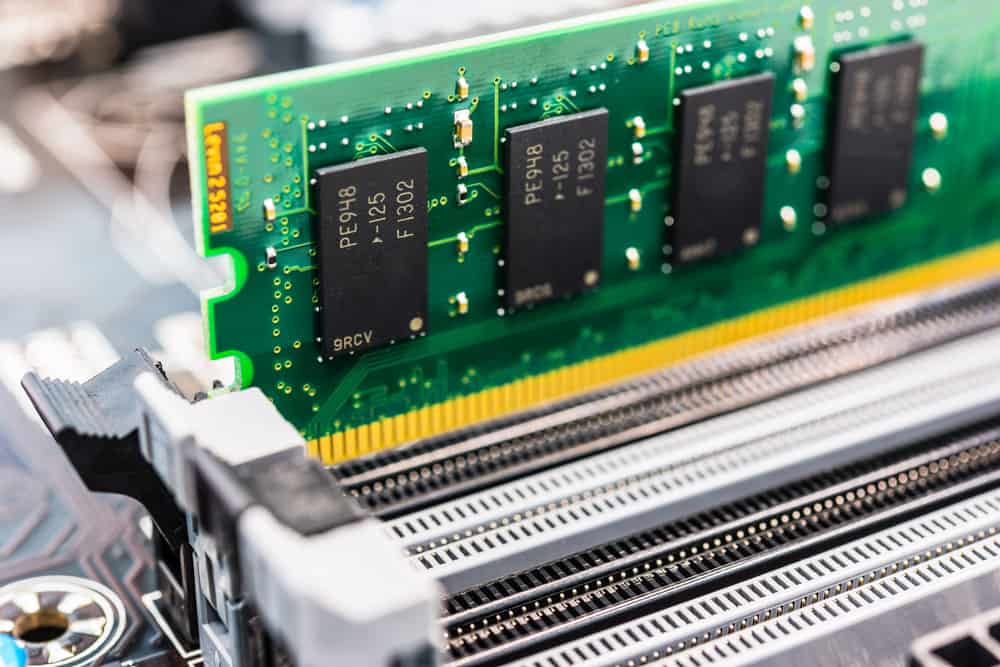
More often than not, your RAM is responsible for your sudden computer reboots, and this has many reasons.
Maybe your memory modules aren’t placed in the correct order.
Maybe a specific defect in the component is causing your system breakdown.
Especially if you notice a beeping sound when your computer restarts with no BSOD, it means your issue most likely has something to do with your RAM.
Here’s what to do:
- Detach your memory modules, clean the slots, and properly reattach them to ensure their correct placement.
- Use your Windows Memory Diagnostics tool or Memtest86+ to check for memory issues.
13. Update BIOS
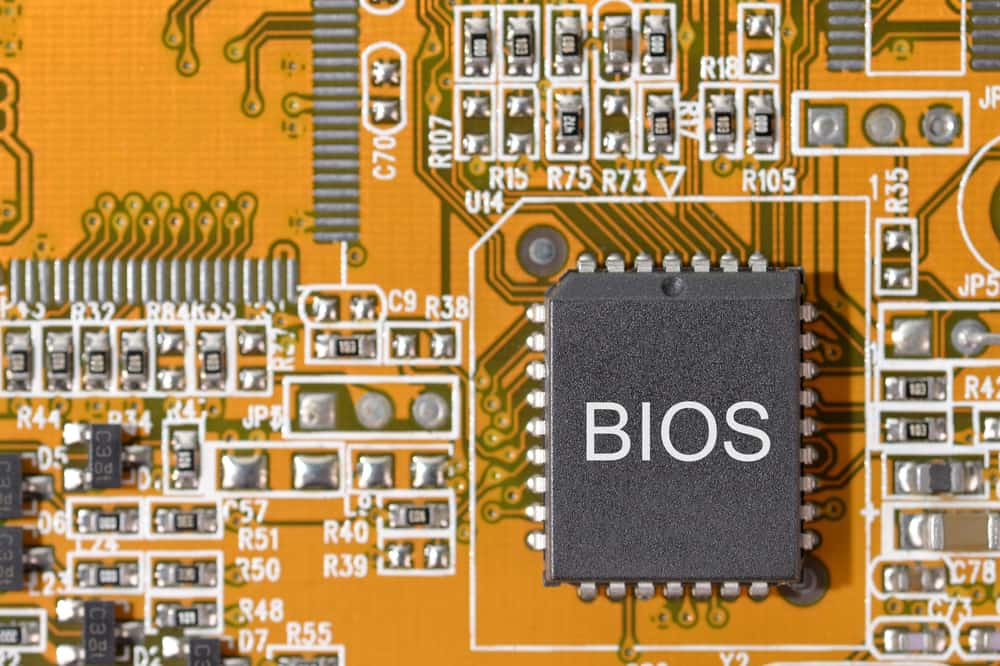
BIOS is a small piece on your motherboard that helps your OS recognize other PC components such as RAM, CPU, and GPU.
Simply put, it turns on your PC’s essential hardware, so it’s no surprise that your system acts strangely if it becomes obsolete or iffy.
Your Windows BIOS interface needs systematic updates, but there’s no automatic way to handle it, unlike other software.
Besides, it’s a sophisticated process that requires advanced knowledge.
If you make any mistakes with these steps, it could bring irreversible, serious harm to your system.
Therefore, you can skip the instructions and let a professional take care of the issue if you’re not confident in your skills.
- Search the System Information tool in your Start menu and open it.
- Spot and write down your System model and BIOS Version/Date.
Note: If your PC is custom-built, you’ll only need the latter.
- Then, head to your manufacturer’s website and download the latest BIOS version by inserting your current BIOS model.
- Once the download is complete, unzip and store it in a folder.
- Move the files to a portable memory storage such as a flash drive. (That’s because your BIOS page has no access to your HDD.)
- Restart your computer, and before the blue screen and Windows logo pop up, press F12 to enter the BIOS control panel.
Note: You may need to replace the key with Del, Esc, or other buttons depending on your PC brand.
Your computer will guide you on what key to press.
- Look for a “Backup” option in the BIOS interface so you can reverse the process if anything goes wrong.
- Find your flash drive in the “Boot” or “Advanced” tab and run the executable file to install the new BIOS version.
Important Note: Never restart, turn off, or unplug your computer during the update process.
Otherwise, your BIOS may become corrupt, making your system totally inoperable.
- Exit BIOS when finished.


